Video Tutorial- How to Push to Github with an Authentication Token

The last day to use a password for command line access to GitHub will be August 13th. In this tutorial, we will set up and use a Personal Access Token in place of a password.
Hello [readers]. Recently I was updating JGD-BizElite to add a new page template. I usually have two versions of the theme– one for WordPress.org and the development version for GitHub.
So after committing, I pushed the file as usual. So far everything went as normal.
When I was checking my email, I got this message from GitHub.
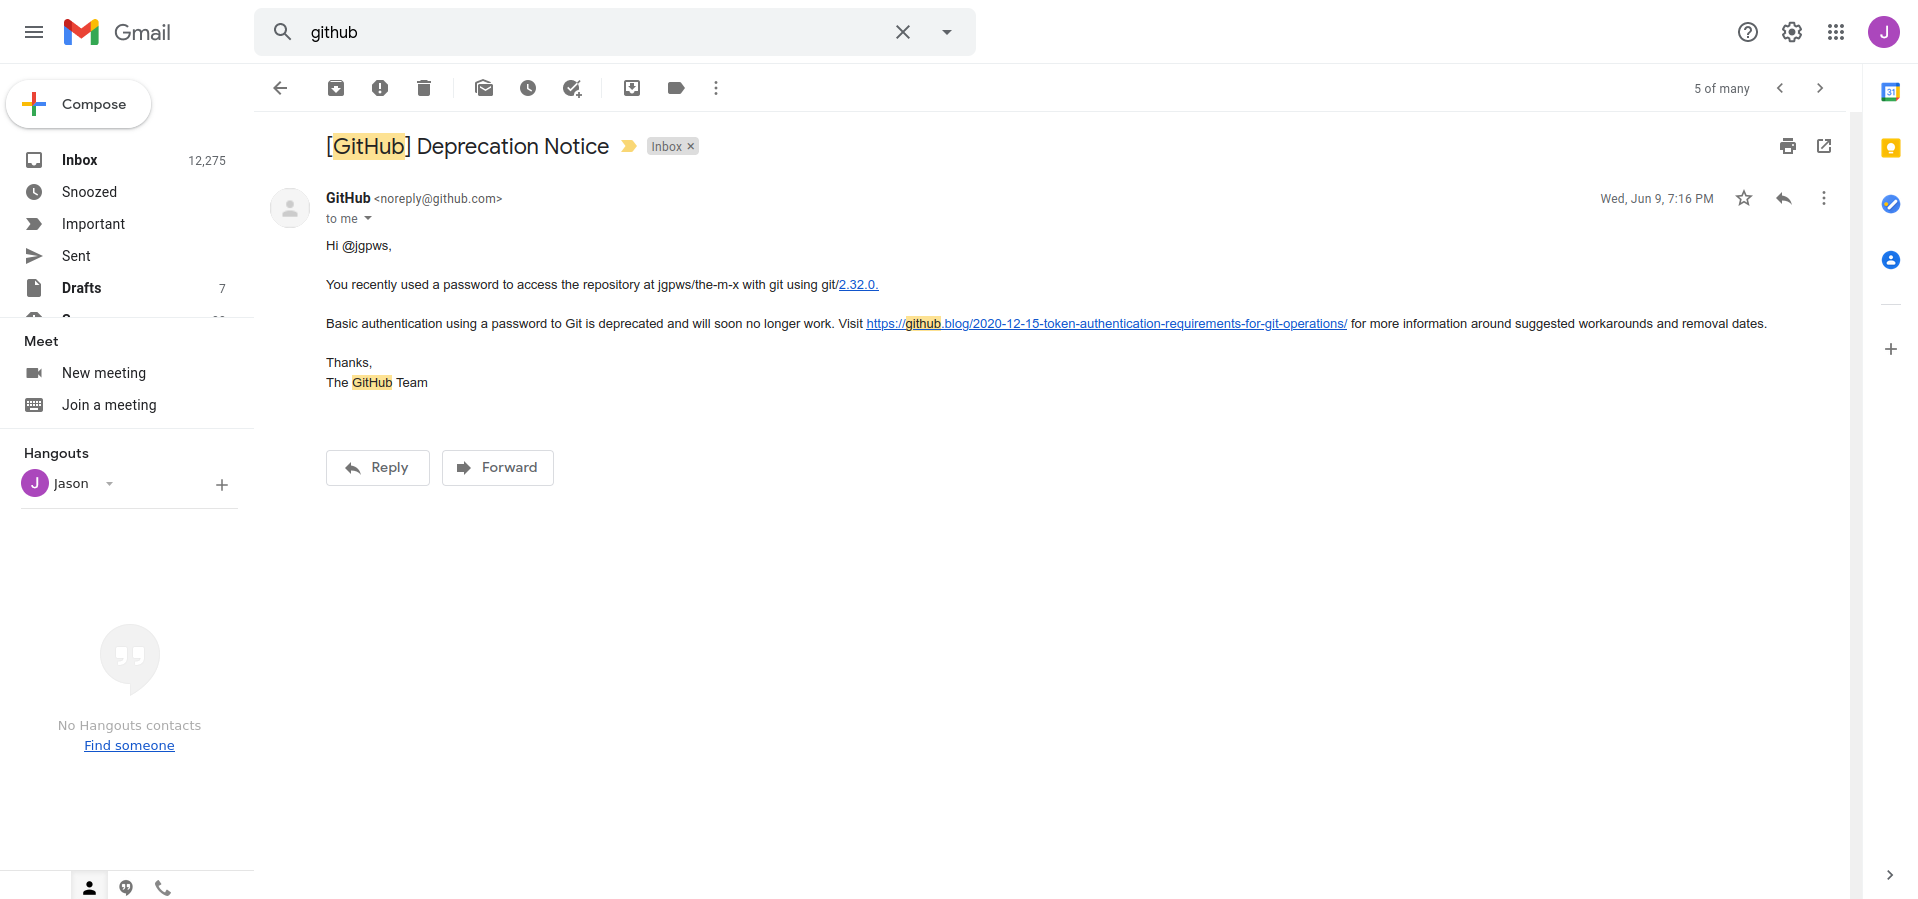
It states that authentication using a password will no longer work along with a link for what to do about it.
Alright. So, I already knew about this and did this process at least once.
In this video, we will follow step-by-step from GitHub’s website how to add an authentication token and use it in place of a password.
Step 1
Following the email link led me to the Token authentication requirements for Git operations page.
First, it goes over what was in the email, telling us that from August 13th onward, passwords will no longer be accepted.
It will affect command line Git access, which is what we are doing.
Further down, it elaborates, saying we need a Personal Access Token.
Even further still, it also says brownouts will be scheduled for June 30th and July 28th,, where passwords will temporarily fail.
Step 2
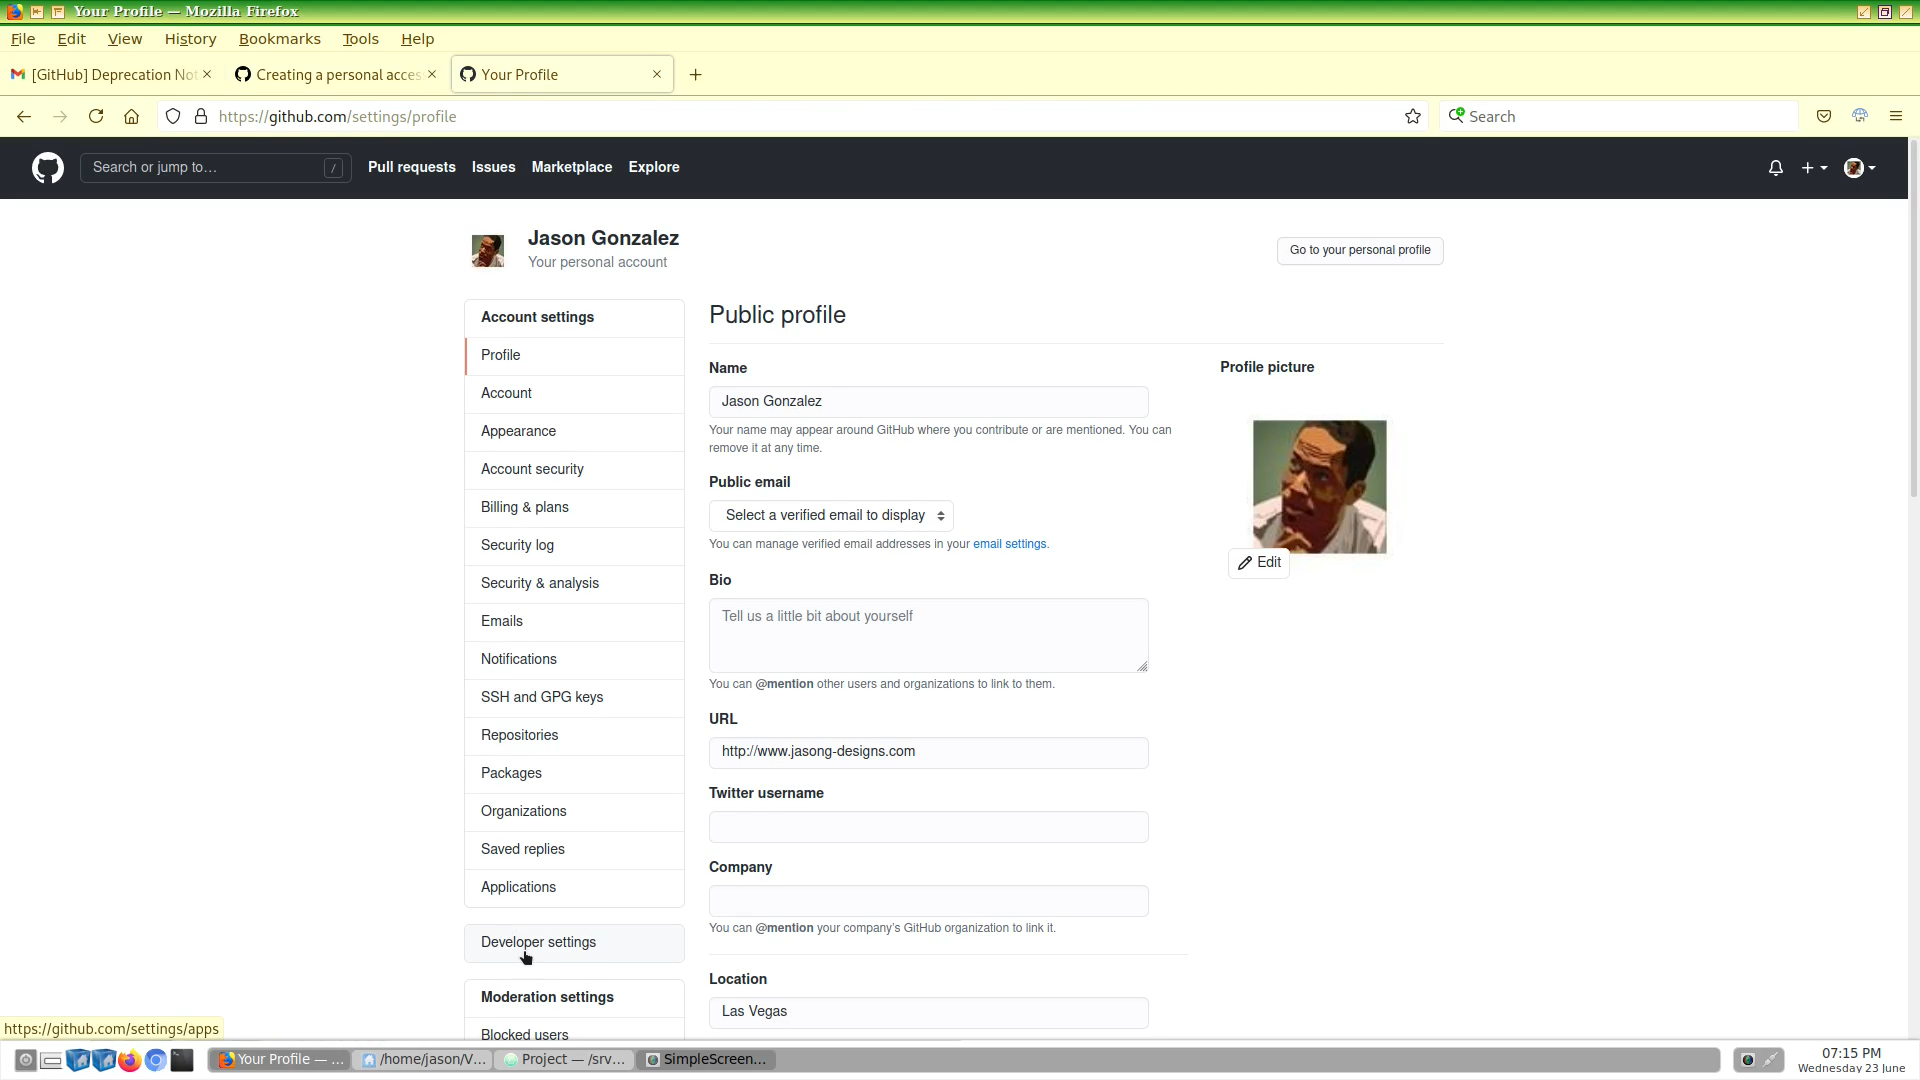
On the Creating a Personal Access Token page at GitHub, the first step is to verify your email address with GitHub.
From the GitHub front page, look for your avatar in the upper right, choose Settings from the dropdown.
Then, go to Developer settings in the left sidebar.
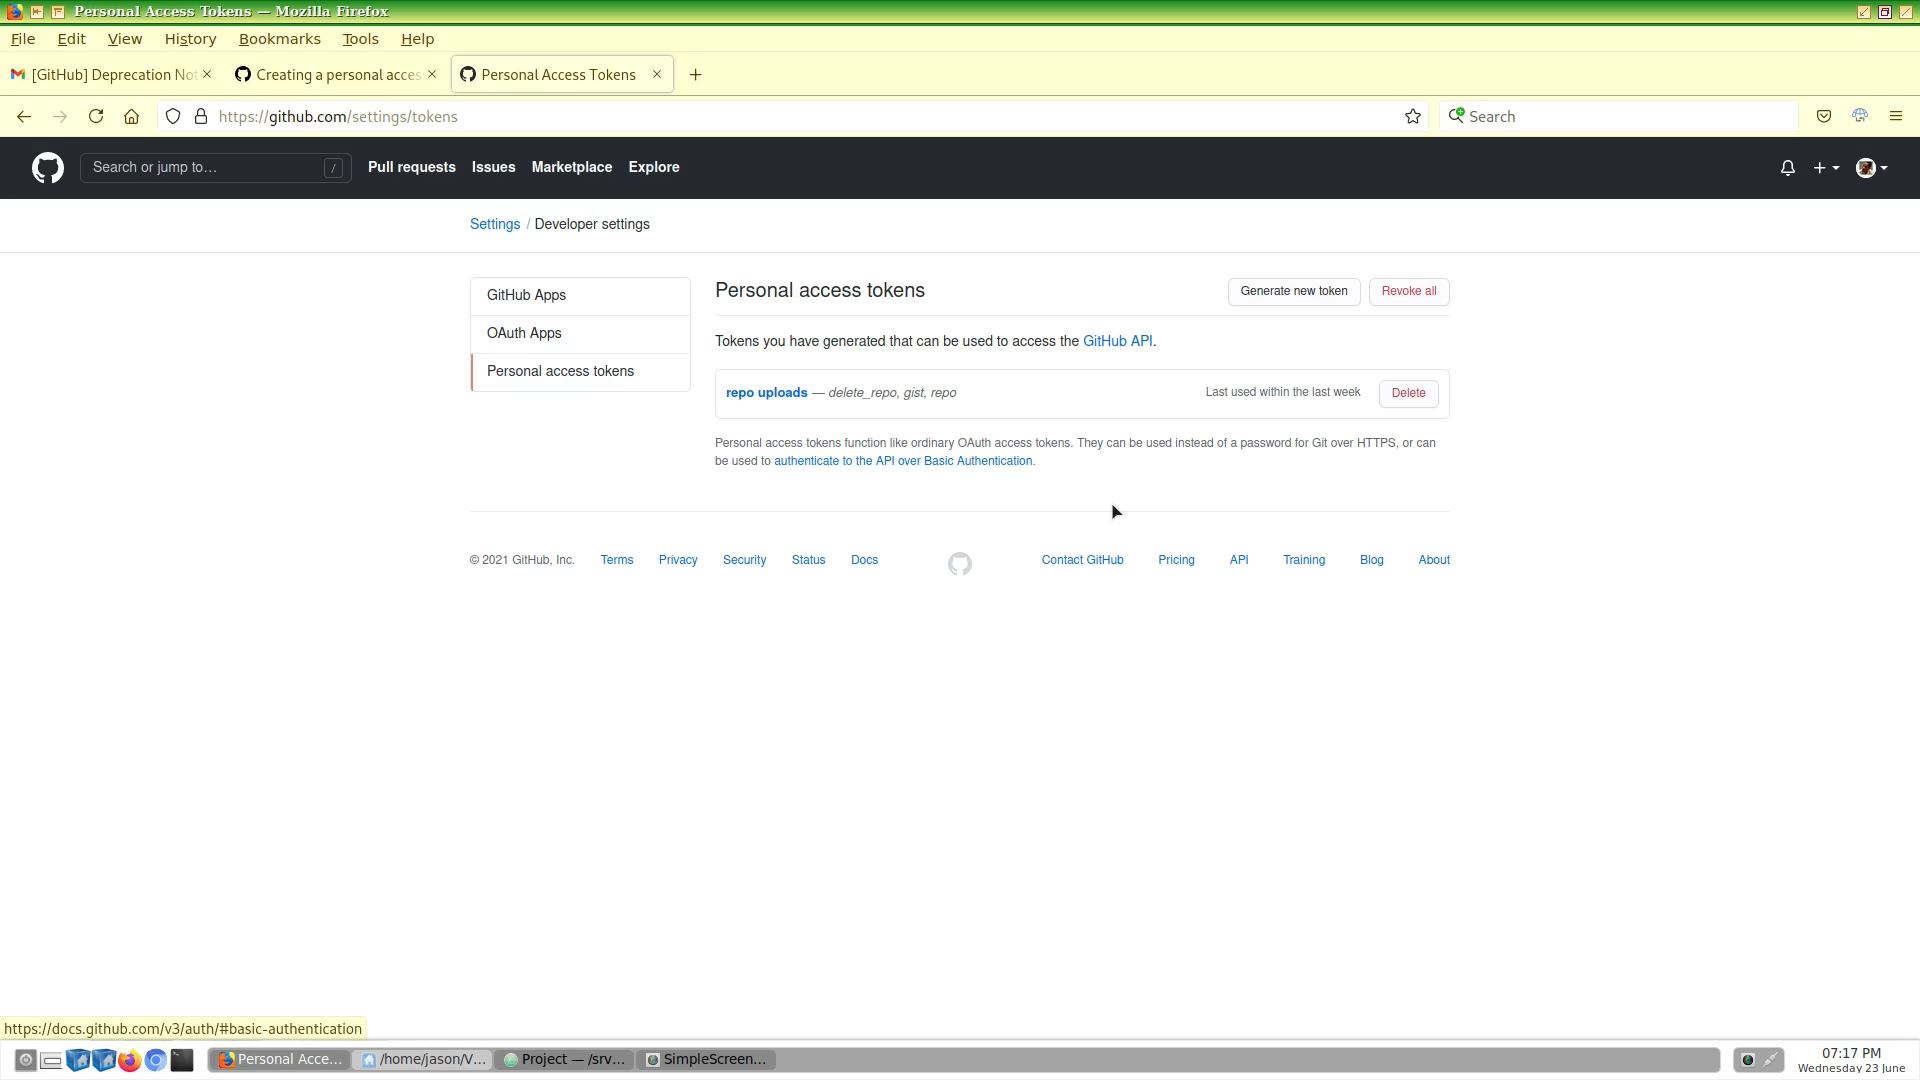
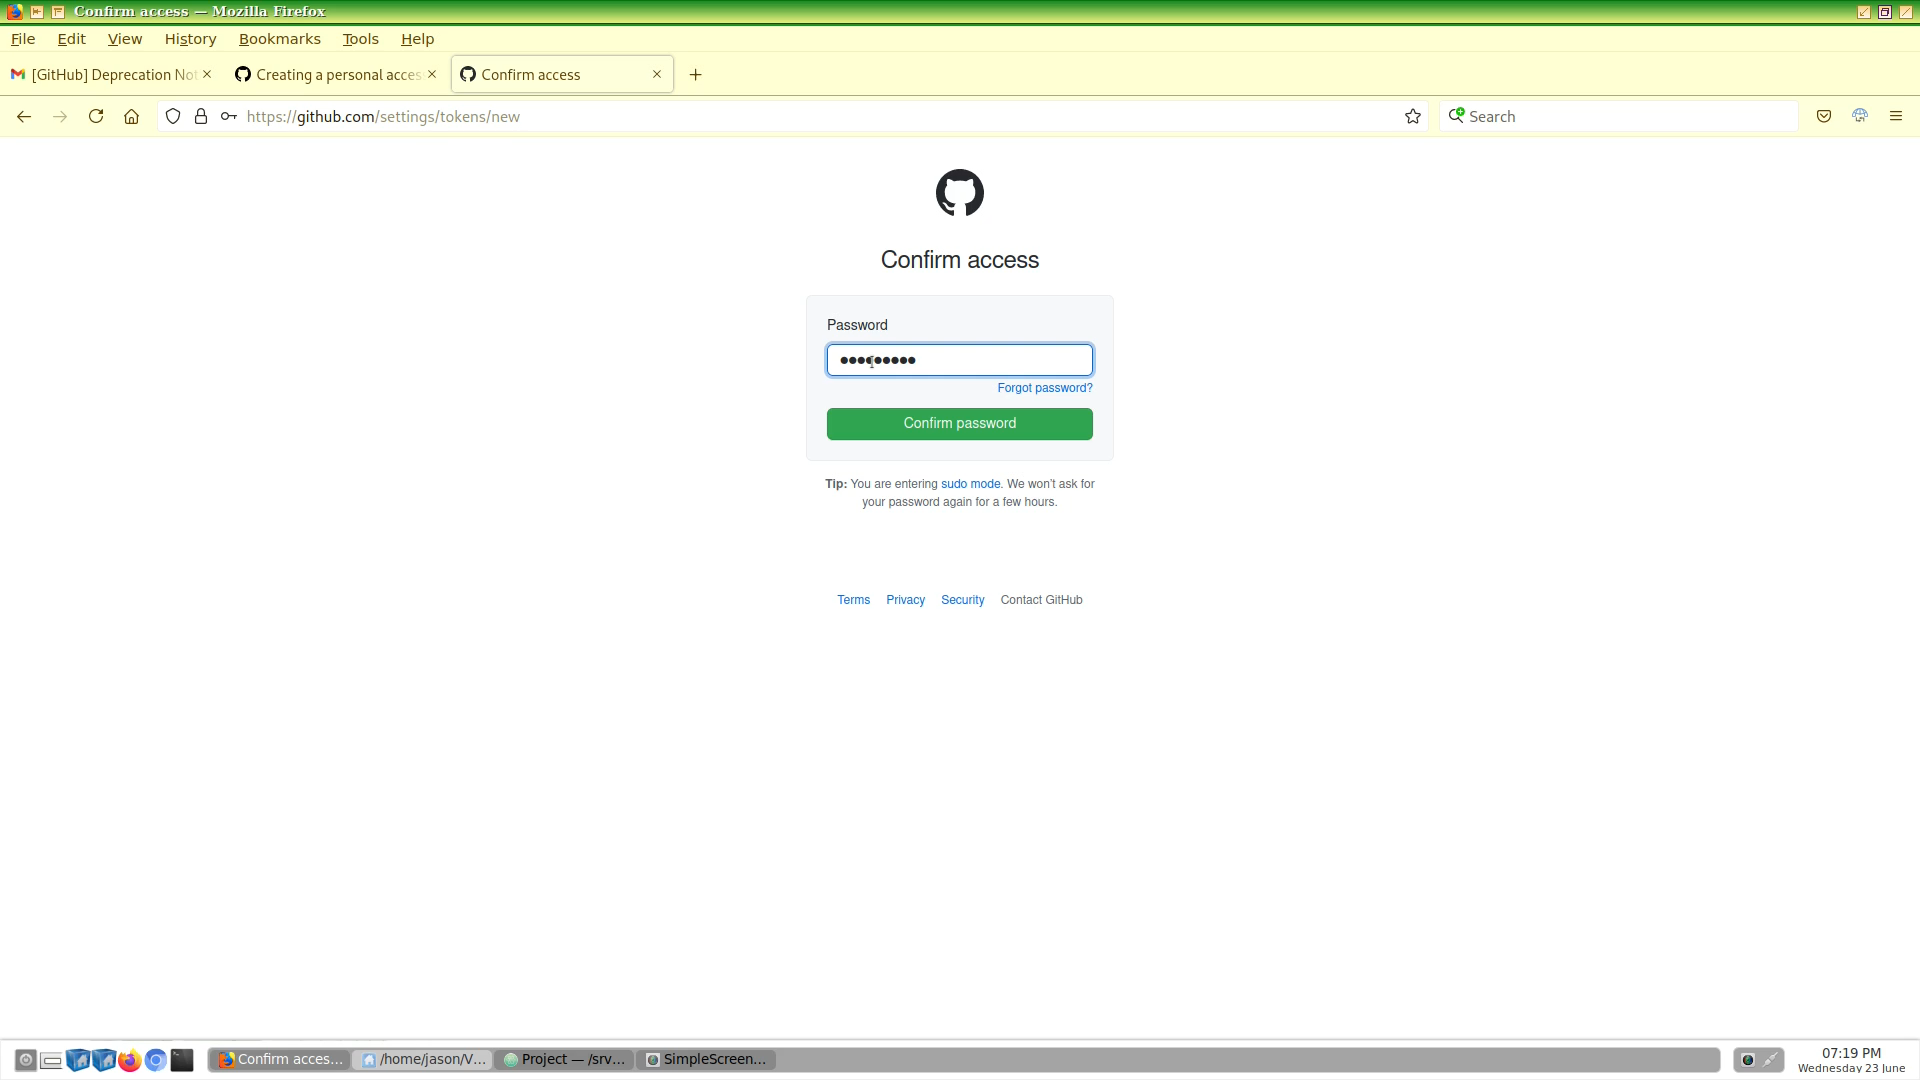
From there, we want to click Personal access tokens and enter your password.
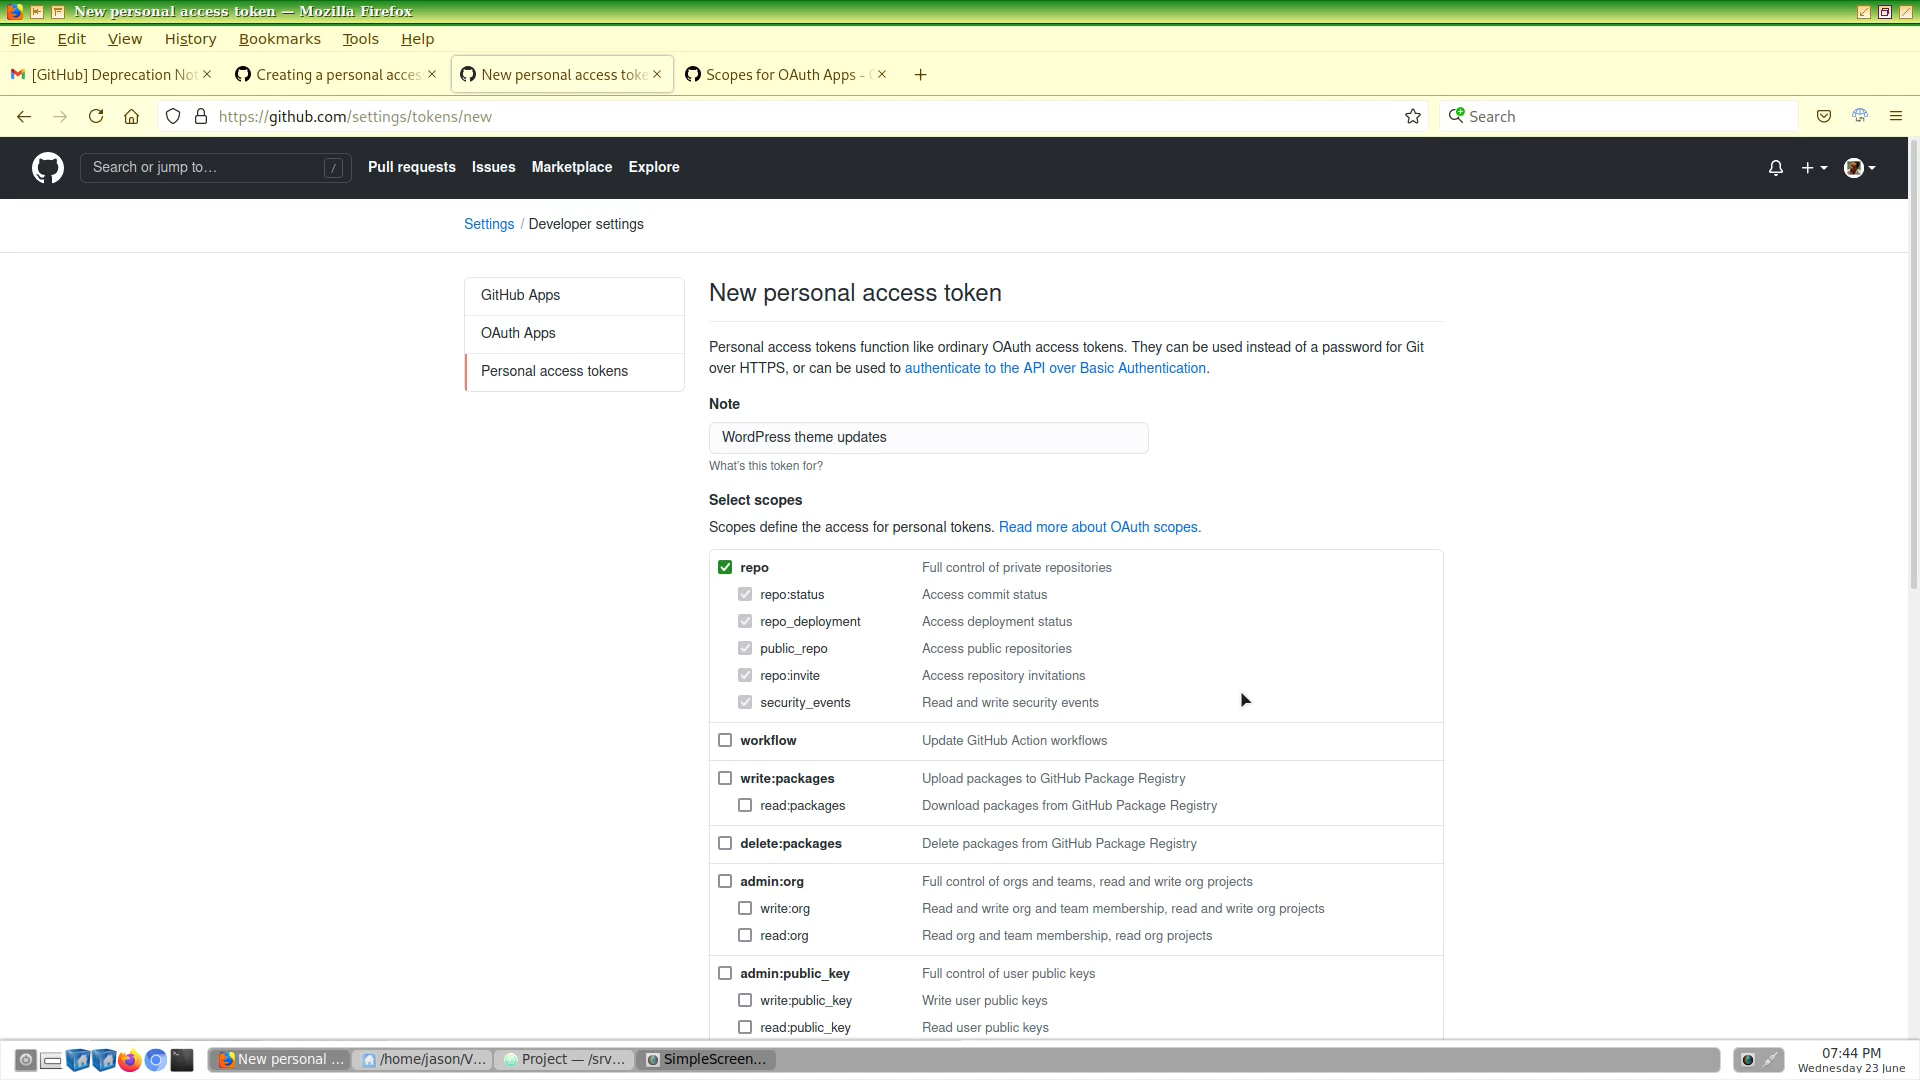
On the New personal access token page, enter the note of what the token is used for. In my case, it is for general WordPress theme code updates.
For this token, we want to give repo and delete_repo scope. Repo scope is definitely necessary, as it will allow us all the command line basics for remote repositories, such as accessing and pushing to and pulling from the repo.
Once you click Generate token, it takes you to the next page with your generated token.
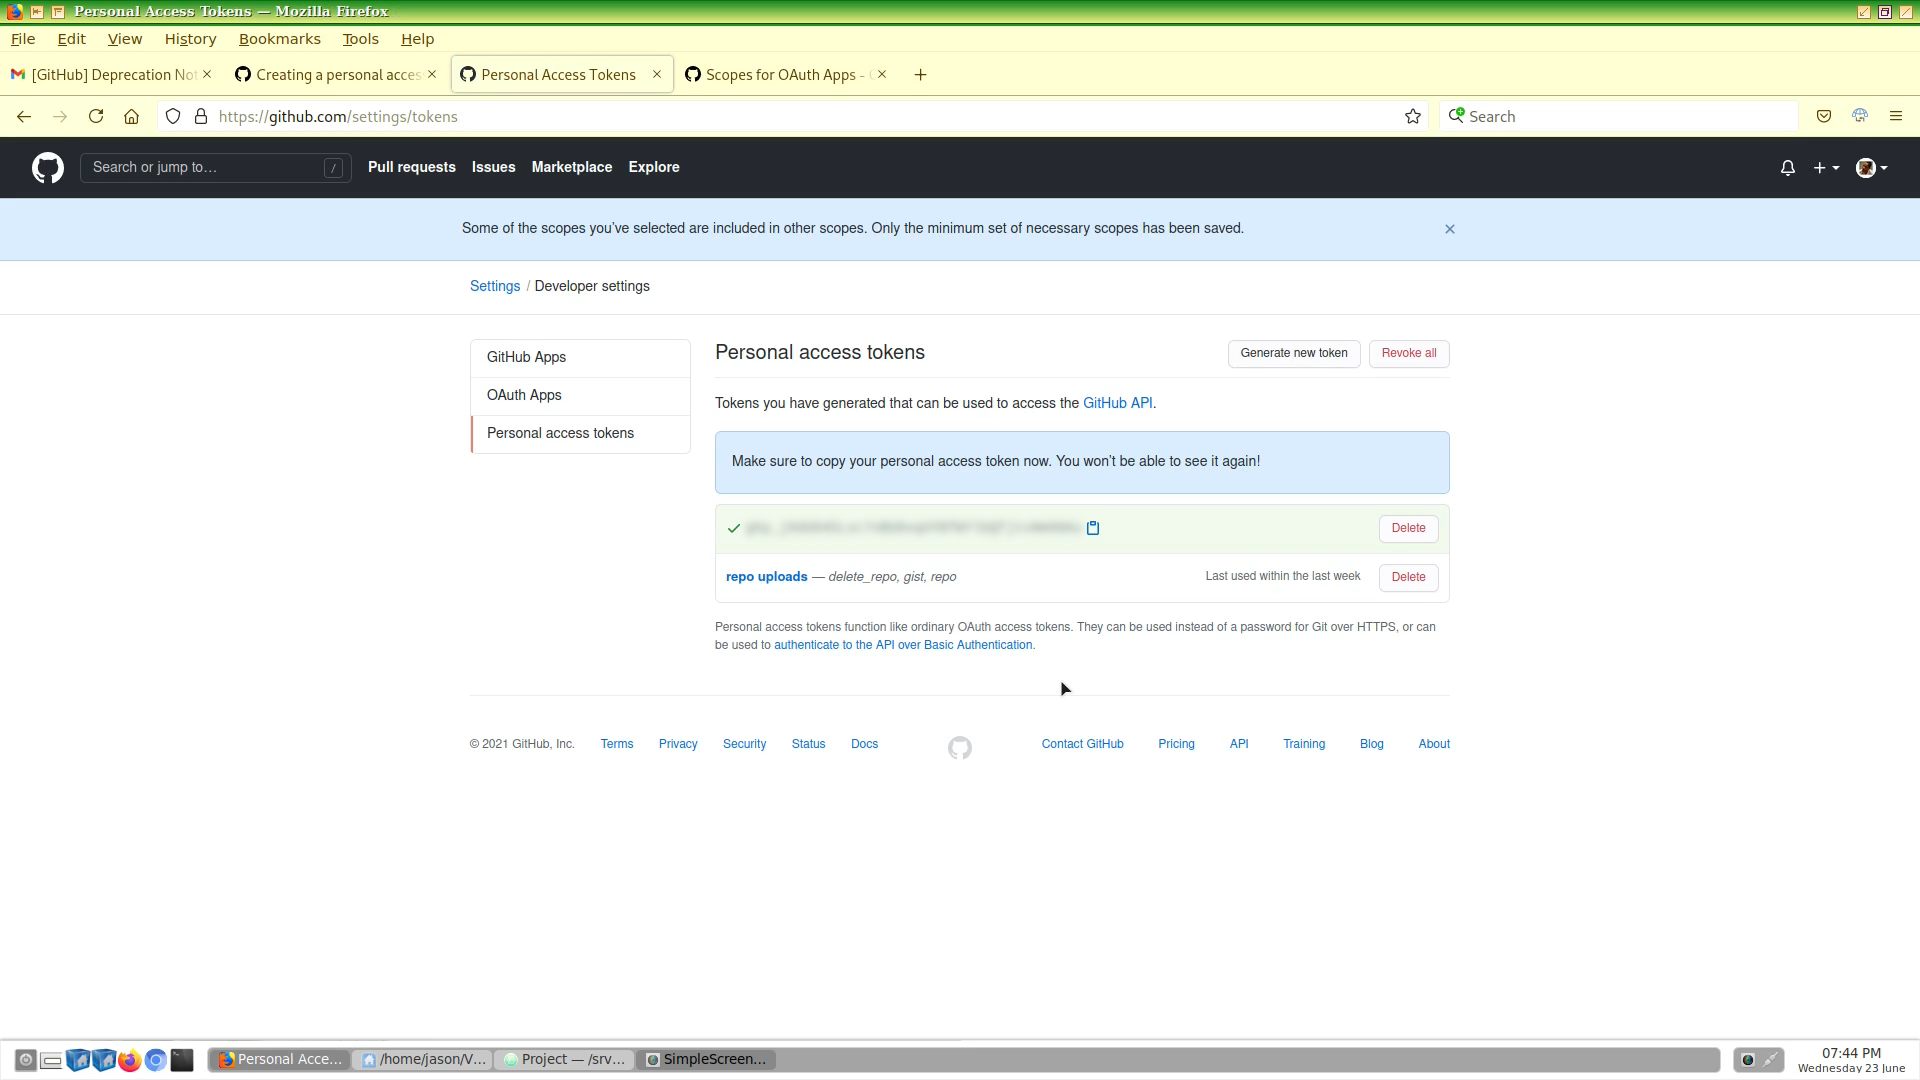
As it says at the top of the page, it is of the utmost importance to copy this token and paste it somewhere for storage, as you will need to use it when pushing files to your remote repos.
I copied mine into a github_tokens file.
Finally, next time when you are pushing new files to your remote, you can enter the token in place of the password.
Since no one would want to enter such a long string of characters by hand, you can copy the characters from your token file and paste them to the command line.
Usually pasting is Ctrl or Command+V, but in this case, I’m using the Terminus plugin for Atom.
For that plugin, to paste is Alt+V.
There is a way to cache the last used password to make this process automatic. But for now, I will use the copy and paste method. But, the link for how to cache the password will be in the description.
And that’s how to authenticate your repo with a token.
Thanks for reading. If you watched the video, please hit the Like button and Subscribe for more great content.
Leave a Reply