Video Tutorial- How to Implement Previous and Next Selection with JavaScript
In this tutorial, we will create a basic selection interface. Using JavaScript, HTML and CSS, our finished product will highlight identical elements on the screen from clicking next and previous buttons.
Video Transcript
In this tutorial we will explore how to create a basic selection interface. Basically, we will be using CSS and JavaScript to highlight a div element to go from one element to the next– or previous.
Once the counting stops, the next or previous highlighting will stop and the previous or next button will become disabled.
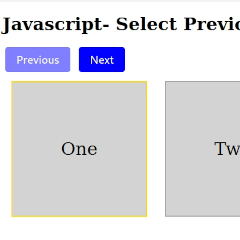
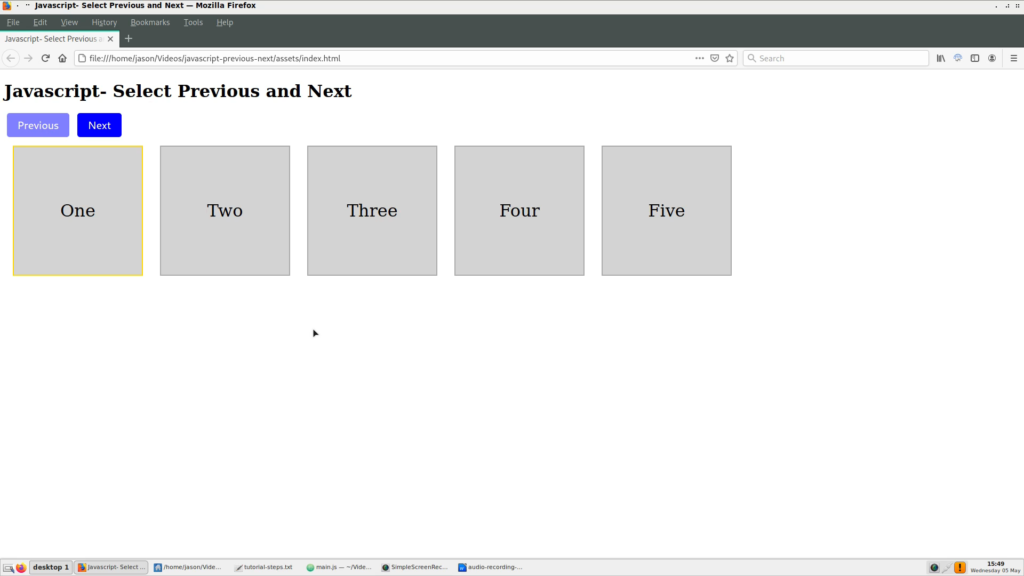
This [screenshot] shows what we want to achieve with our final product.
Setting Up
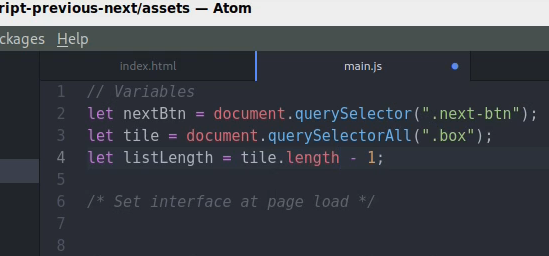
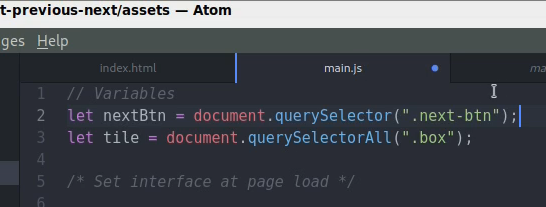
In this screen we have our setup ready to go. I set up an index.html page, a main.js file and some CSS. I did a simple Flexbox layout for our tile shapes.
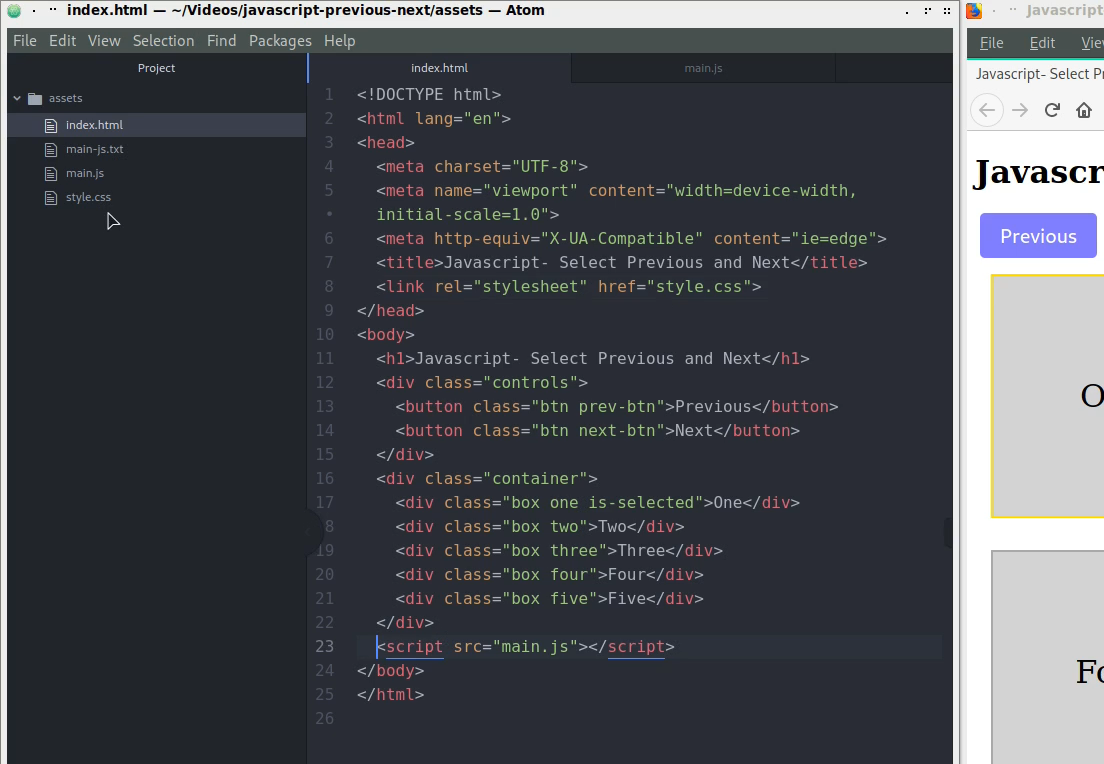

For those who want to follow along with the video, I added these files to a GitHub repo called Tutorial Resources.
If you want the code for this specific tutorial, you can copy and paste the raw code from GitHub. Just make sure each file is in the same directory at a single level.
Also in Tutorial Resources is the main-js.txt file, which we will work from. So, since main.js has the completed project, let’s erase everything [in main.js] except the comments to start anew.
Step 1
First, we start with the counter. This counter example comes from the Closures article at Mozilla Developer Network, linked in the description.
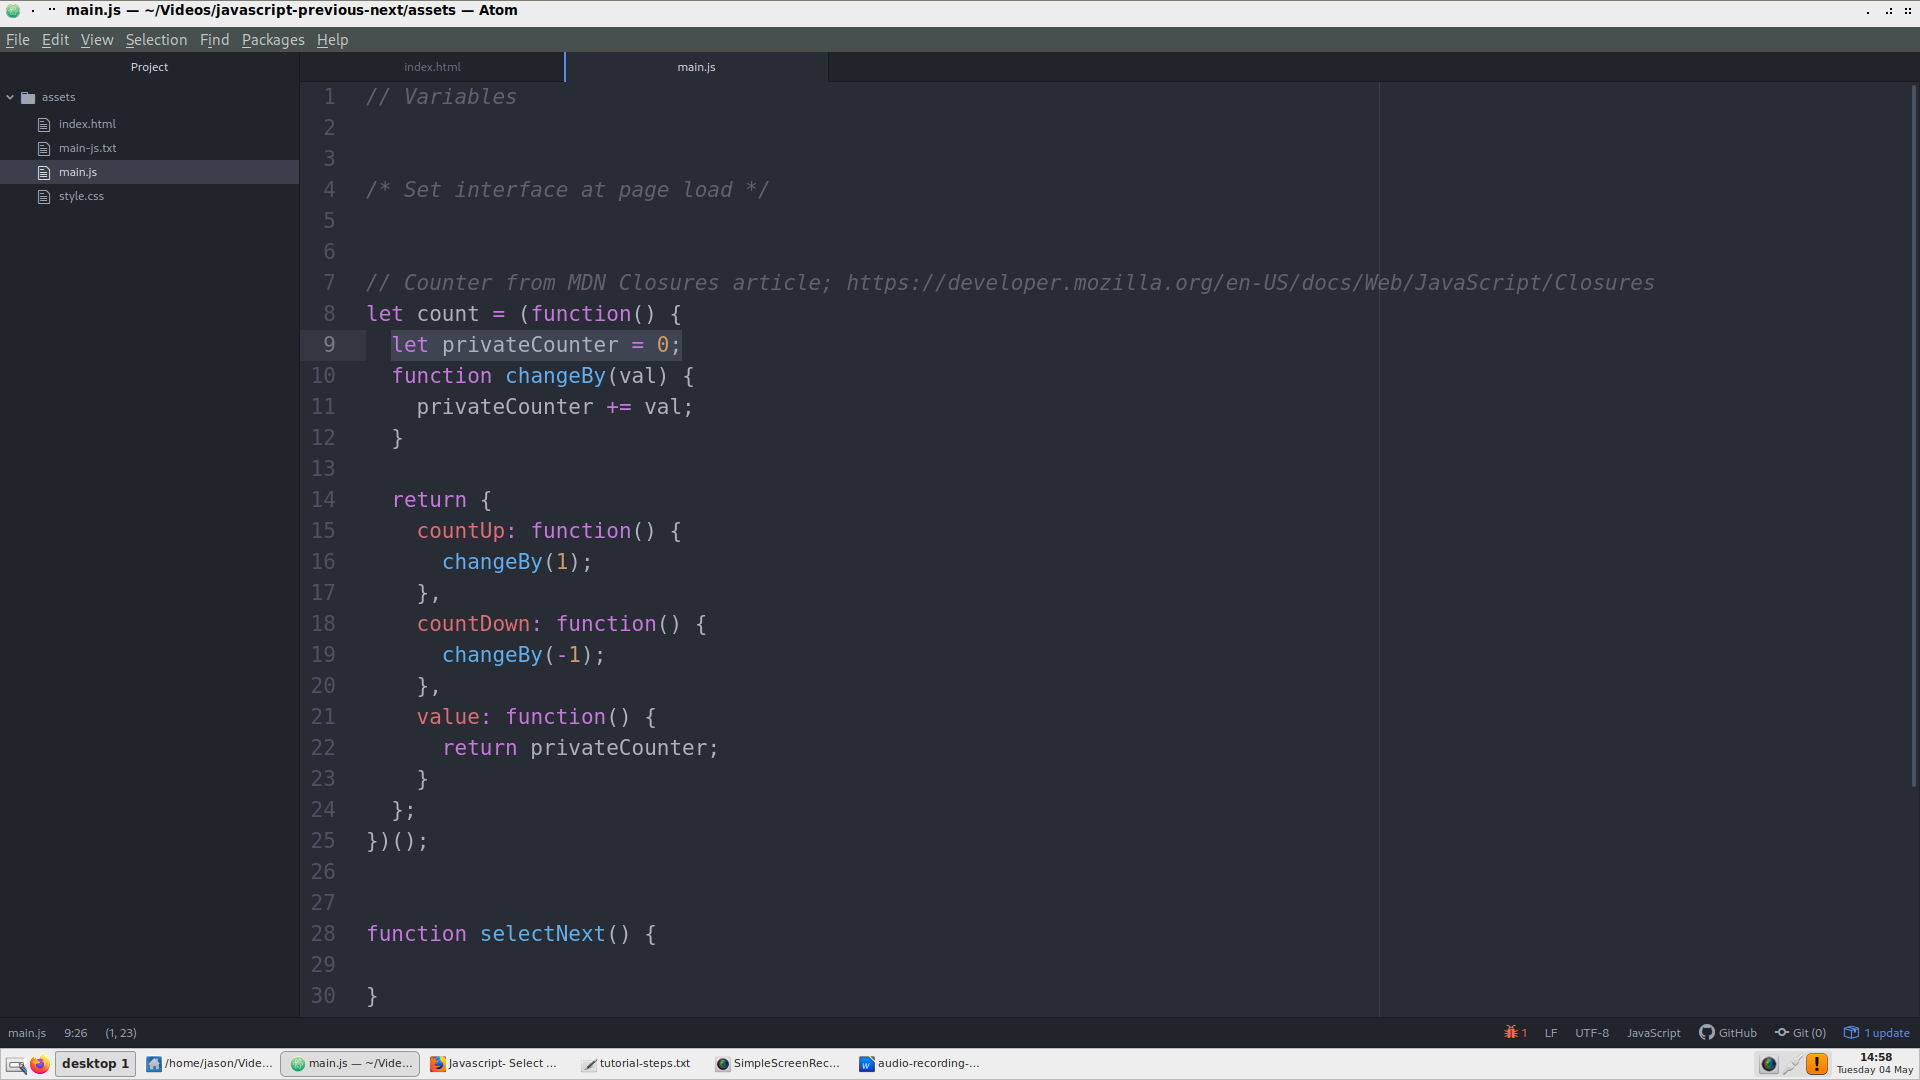
What this does is assign the first number to a variable– zero. This will be our array index initial value.
The changeBy function changes the provided value up or down, depending on a positive or negative integer.
The return value of the entire count function provides two more functions that use the changeBy function, countUp and countDown. These use a value of 1 to increase and -1 to decrease, respectively.
Finally, the last function returns the privateCounter variable, which holds the value of our changed number.
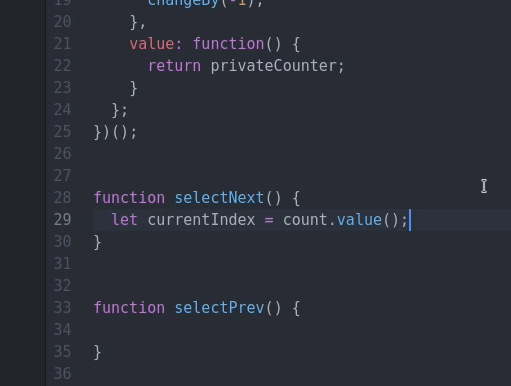
Step 2
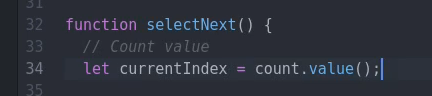
In the selectNext function, let’s assign a value to a variable. We will set up the variable currentIndex and assign count.value(). You might notice that this is our return value from the count function from earlier.
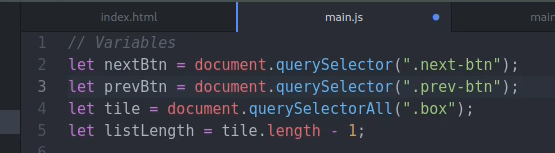
Before we go to the next step, let’s add a tile variable to the very top of the file under variables. We will assign it to all divs with a class of .box using document.querySelectorAll.
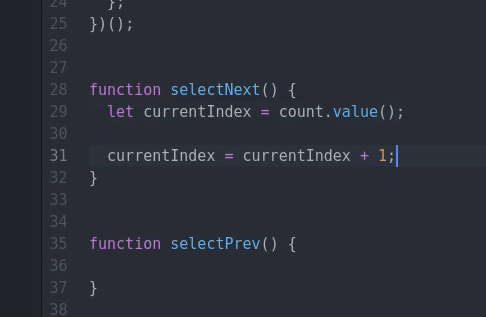
After, we need to increment the value once by 1. This is done because on first click we will need to increment the index starting at 1 instead of 0. You will see this in action soon.
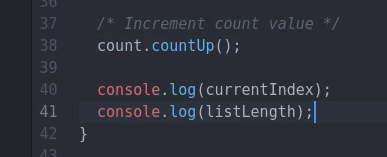
Next, we can add a console log to check the length of our nodelist. It returns 5.
Since our nodelist length returns 5, but our count value starts at 0, we will add a new variable titled listLength and assign it our tile length minus 1.
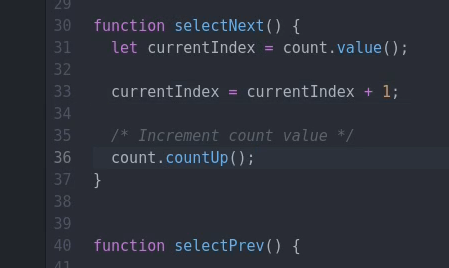
Right after that bit of action, we can now add the code that increments the index each time the next button is clicked, using the count function’s inner function, countUp.
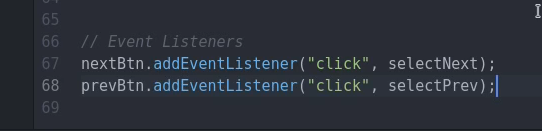
In order for this to work, we must add a new variable for our button and an event listener.

Setting up two console logs for the currentIndex and listLength shows us how the numbers will match with each click.
Step 3
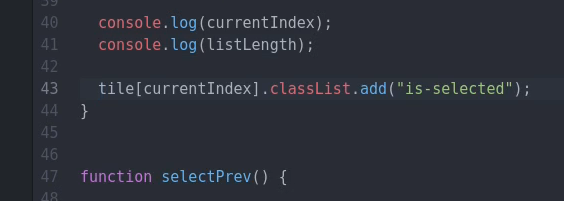
Next, we apply the index to our tile divs. To do this, we reference our tile variable, which holds our nodelist of divs.
Putting currentIndex in square brackets indicates which div we are on, according to the counting up of the index number.
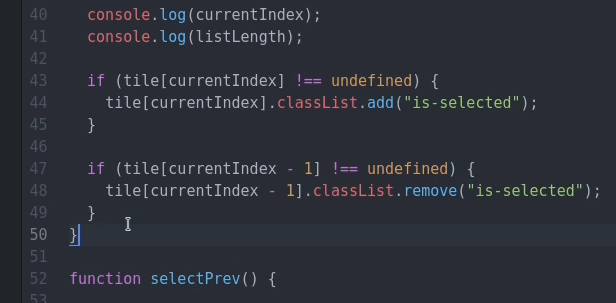
As you can see, the divs are being highlighted one after the next, but the previous one isn’t being un-highlighted. Also, in the console, when we go higher than the amount of divs in the list, we get an undefined error. We will address this shortly, but fix the highlighting issue first.
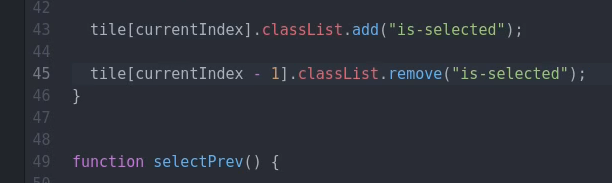
On the next line of code, we have the same thing, but we subtract 1 from the currentIndex to target the div right before. This time we use .classList.remove.
Now, for the undefined issue. For these, we will simply wrap the previous lines of code with if statements to check for undefined values.
Currently, when we click above the maximum index number, represented with our listLength variable, the index and highlighting keep going. We want the highlighting to stop when it reaches the final index position.
To do this, we will make the next button disabled when we reach the last tile. To get the copied if statement to work, let’s add a reference to the upcoming previous button.
Here, we are checking if the currentIndex is equal to the nodelist length. If so, then we use the setAttribute to add a disabled attribute to the button. In CSS, I lowered the opacity for disabled buttons.

Step 4
Next, we can start on the previous tile functionality. First, we need to add it’s event listener.
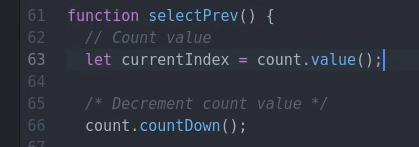
After playing around with the location of the currentIndex line of code, I discovered it can be used outside of each selection function, so we can move it just below the count function.
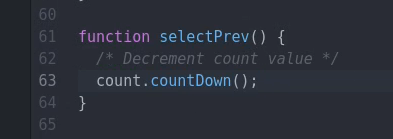
We can next add the index decrementing code.
Just like before, we add code to highlight a tile. But, this time we not only check for undefined values, but also check to see if the current index is greater than 0.
To select the previous tile, we subtract 1 to choose the tile before the current one, then add the class is-selected.
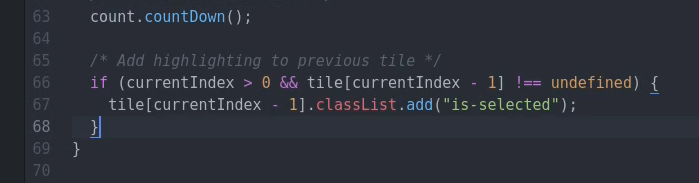
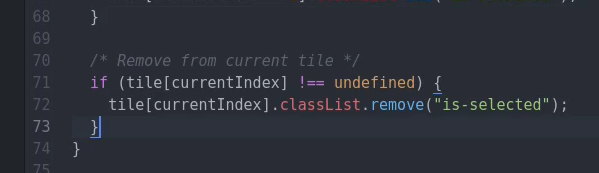
Then, we want to remove the highlighting from the current tile.
After testing out the functionality of the previous button, it wasn’t working correctly. It turns out that both the previous and next functions need their own reference to the count.value() function, so I adjusted the code to how it was before.
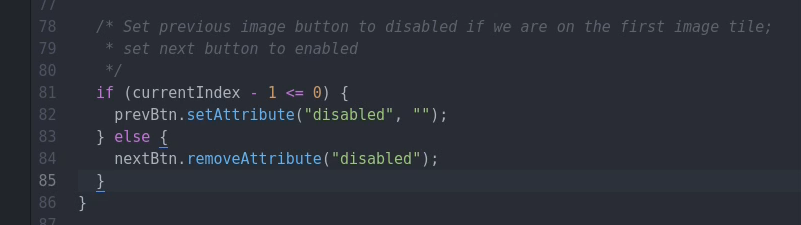
Our final step for this tutorial is to paste in our code to disable the previous button if we reach the first tile going backwards.
For this, we check if the index right before the current one is less than or equal to 0, then set the disabled attribute. In the else, we remove disabling for the next button if it is at the last index.
Conclusion
In a shameless plug, I would like to point out this concept being used in jgdGalleryMaker, an online copy and paste service I created where you can add an instant photo gallery to your website. Links to this and other resources will be in the description.
And as always, please subscribe to my channel if viewing this on YouTube. Thanks for reading.
Leave a Reply