How to Apply a Lightbox Script to Linked Images
This tutorial picks up from the last tutorial in a series, titled How to Convert a Desktop Design to a Responsive Design- Part 3. However, that tutorial isn’t required as a prerequisite. In this one, we will use the lightbox2 script in our portfolio example, then apply it to all linked images. Quite simple. Let’s get started.
Grab the Scripts and CSS
The script we are using for this example is Lightbox, version 2 by Lokesh Dhakar– an updated, responsive version of the script I used before.
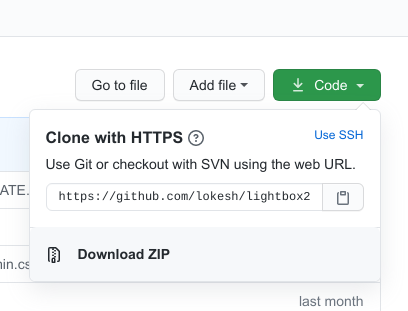
- First, we want to go to the Lightbox GitHub page and Download ZIP, as shown in the screenshot below
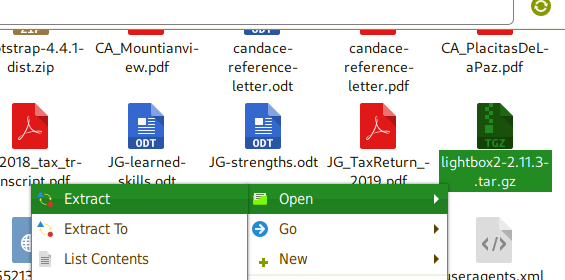
- Next, we want to go to your Downloads folder and extract the zip file. This differs per operating system. On any Linux distribution, if you have the unzip utility, you can run the command
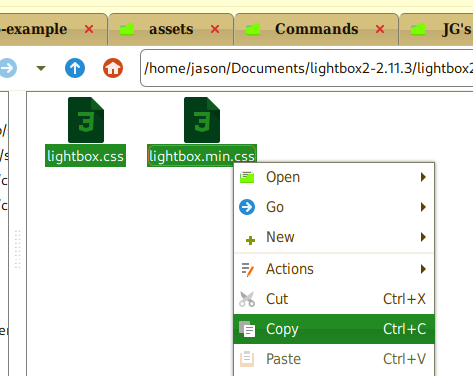
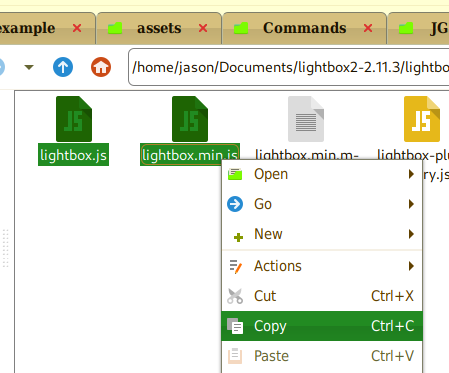
unzip lightbox2-2.11.3.zip. Alternatively, if you downloaded the tar.gz files, runtar -xzvf lightbox2-2.11.3.tar.gz - After this, we want to go into the unzipped folder and copy and paste the lightbox.css and lightbox.min.css files into a
/cssfolder relative to our project’s root folder. We want to do the same for the files lightbox.js and lightbox.min.js, placing the files in our own/jsfolder
- This script requires jQuery. Even though there is a version that comes with jQuery, we will add standalone jQuery to our project, as we might want to use it for other things. For this, we will link to the latest CDN version, which we will do next
Linking to the Script/CSS files
- We will link to the required jQuery first. For this, head to code.jquery.com, and use the latest version. As of this writing, it is 3.5.1. I chose the minified version
- Paste the code from the textbox into your footer (or footer.php include) just before the closing
bodytag
    <script src="https://code.jquery.com/jquery-3.5.1.min.js" integrity="sha256-9/aliU8dGd2tb6OSsuzixeV4y/faTqgFtohetphbbj0=" crossorigin="anonymous"></script>
</body>
- Just after that, we can link to our lightbox script and initialize it:
    <script src="https://code.jquery.com/jquery-3.5.1.min.js" integrity="sha256-9/aliU8dGd2tb6OSsuzixeV4y/faTqgFtohetphbbj0=" crossorigin="anonymous"></script>
    <script src="js/lightbox.min.js"></script>
    <script>
        lightbox.option({
            'disableScrolling': true
        });
    </script>
</body>
- Note that we set
disableScrollingto true. This disables scrolling while the lightbox is dsiplayed - Next, let’s link our CSS files in the header. Just before your stylesheet, add:
<head>
    …
    <link href="css/lightbox.min.css" rel="stylesheet" />
    <link href="style.css" rel="stylesheet" type="text/css" />
</head>
Apply the Lightbox Functionality to our Images
The new lightbox uses data attributes to display an image linked to from an anchor tag. Specifically, it uses data-lightbox. According to the documentation, it is advised to use a unique name for single images. For a gallery, which we will do below, we want to give each image the same data attribute name. A Codepen example of the finished project with lightbox is at the bottom of this tutorial page. We will its gallery as an example.
<article class="entry">
    <header class="entry__header">
        <h3>Project 1</h3>
    </header>
    <div class="entry__content">
        <div class="gallery">
          <a href="https://www.jgpws.com/tutorials/images/portfolio-example/jgd_themes.png" data-lightbox=”jgd”><img src="https://www.jgpws.com/tutorials/images/portfolio-example/jgd_themes_small2.png" width="200" height="200" alt="Jason G. Designs Themes page" title="Jason G. Designs Themes page" /></a>
          <a href="https://www.jgpws.com/tutorials/images/portfolio-example/JGD_webpic_02.jpg" data-lightbox=”jgd”><img src="https://www.jgpws.com/tutorials/images/portfolio-example/JGD_webpic_02_small2.jpg" width="200" height="200" alt="JGD Shop" title="JGD Shop" /></a>
        </div>
    </div>
</article>
Conclusion
It is just as simple as that to apply a lightbox script to your images. Add the data-lightbox with a unique name and you have images that open up in a modal window instead of a new one.
The Codepen that shows this in action is below.
See the Pen Portfolio layout Lightbox by Jason Gonzalez (@jgpws) on CodePen.
Leave a Reply