Adding a Robust Lightbox Script to a WordPress Theme

Introduction
Over the last couple of days if you’ve been visiting any of my web pages that include a gallery, you might have noticed a new lightbox look and feel. Well, prior to that, I was using a plugin to add the lightbox script.
I started looking at the number of plugins I had (a lot). Coupled with knowledge that I implemented a built-in lightbox script before, I decided to build one in to this site. The plugin I was using before was great with plenty of different lightbox options. But, since I did not need a sizeable plugin for this feature, I decided to go with a built-in Colorbox script. I then customized the look to suit this website’s theme. That part is beyond the scope of this tutorial.
Today, we will create a robust Colorbox lightbox script for a theme or child theme. Let me define robust in this context. Robust means our script will load attachments in an iframe if the thumbnail points to an attachment page. If the thumbnail leads to an image only, it will load within the current page.
Optionally, in a follow-up tutorial, we will add a Customizer control that determines if Colorbox is loaded or not. Then use that to adapt an image template (this part may differ from theme to theme).
This tutorial, on the other hand, is best suited for a theme or child theme that doesn’t have lightbox functionality.
Enqueue the Needed Files
First, we need to get the files we will use from the Colorbox GitHub repo.
- We will go to the Colorbox GitHub page and download the zip file from the Clone or download button
- Then we want to extract or unzip the file using a file manager or the command line
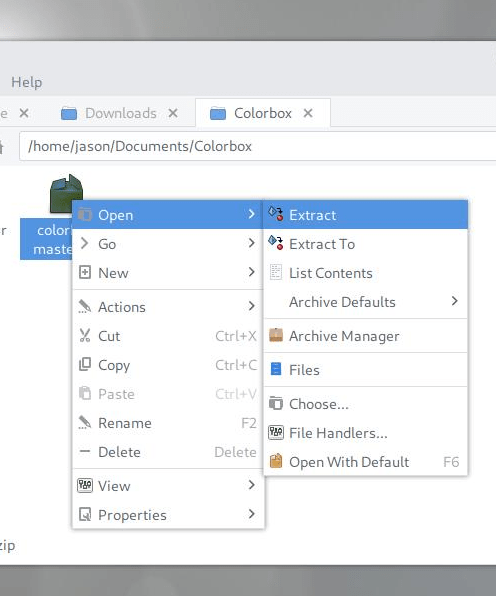
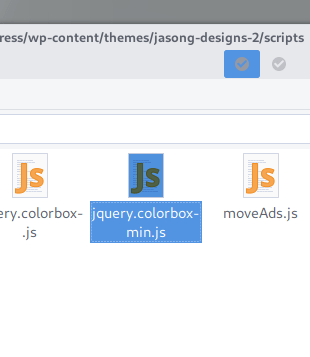
- Once the files are extracted, we can go into the resulting colorbox-master folder and copy the jquery.colorbox-min.js file. Paste this into your theme’s folder where scripts are stored. In the case of my theme, they are inside a /scripts folder
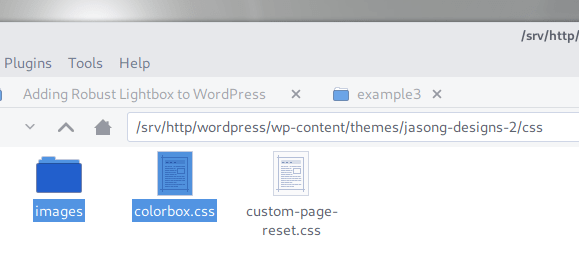
- After looking at the different Demo styles at the official website, I initially decided on example 3. But feel free to choose whichever style you’d like. Inside the colorbox-master folder, copy the file colorbox.css and paste into your theme. In my theme I placed this inside a /css folder. In addition, copy and paste the images folder relative to the colorbox.css file. For instance, /css/images
We are set with the files where we need them. Now, let’s enqueue them into WordPress with the following code in functions.php:
function theme_slug_enqueue_scripts() {
    // Colorbox CSS
    wp_enqueue_style( 'colorbox', get_template_directory_uri() . '/css/colorbox.css' );

    // Colorbox JS
    wp_enqueue_script( 'colorbox', get_template_directory_uri() . '/scripts/jquery.colorbox-min.js', array( 'jquery' ) );
}
add_action( 'wp_enqueue_scripts', 'theme_slug_enqueue_scripts' );
For a child theme:
function theme_slug_enqueue_scripts() {
    // Colorbox CSS
    wp_enqueue_style( 'colorbox', get_stylesheet_directory_uri() . '/css/colorbox.css' );

    // Colorbox JS
    wp_enqueue_script( 'colorbox', get_stylesheet_directory_uri() . '/scripts/jquery.colorbox-min.js', array( 'jquery' ) );
}
add_action( 'wp_enqueue_scripts', 'theme_slug_enqueue_scripts' );
Next, we will add our own script that we can use to initialize Colorbox and dynamically add the script to our links. If you already have a main script file for several scripts, you can add the code there as well. For the purposes of this tutorial we will create a file named colorbox-main.js and enqueue it after the Colorbox script, also making this script dependent on jQuery:
    // Colorbox JS
    wp_enqueue_script( 'colorbox', get_template_directory_uri() . '/scripts/jquery.colorbox-min.js', array( 'jquery' ) );
    wp_enqueue_script( 'colorbox-init', get_template_directory_uri() . '/scripts/colorbox-main.js', array( 'jquery' ), '', true );
The option true puts the file at the bottom of the page.
Choosing Links to Add Colorbox to
Inside our colorbox-main.js file (or your own script file) is where the magic is going to happen. What we are essentially going after is a way to differentiate between whether the link that Colorbox follows is an attachment page or an image. We will do this with highly specific selectors and jQuery’s usage of the CSS :not specification.
In the jQuery :not selector, it allows you to choose a comma separated list of selectors not to target. But, you must choose selectors that follow one another directly. For instance, if you have an a element two levels down from a parent, it must be selected like so: .parentclass > anotherelement > a. We will come back to this when we create a selector for WordPress attachment links.
For now, we will focus on image links. In the colorbox-main.js file, add:
( function( $ ) { // opens document ready

    /* Function to add Colorbox pop up to various links */

    function colorboxLinks() {
        var windowWidth = $( window ).width();
        var galleryImgItems = $( '.blocks-gallery-item a[href$=".jpg"], .blocks-gallery-item a[href$=".png"], .blocks-gallery-item a[href$=".gif"], .gallery-icon a[href$=".jpg"], .gallery-icon a[href$=".png"], .gallery-icon a[href$=".gif"]' );

        // For galleries that link to images
        if ( windowWidth < 640 ) {
            galleryImgItems.colorbox({
                rel: 'gallery',
                maxWidth: '100%',
                maxHeight: '75%'
            });
        } else {
            galleryImgItems.colorbox({
                rel: 'gallery',
                maxWidth: '75%',
                maxHeight: '75%'
            });
        }
    }

} )( jQuery );
Our galleryImgItems variable targets elements that end in .jpg, .png or .gif– images only. I got this idea from the tutorial Adding a Stylish Lightbox Effect to the WordPress Gallery at Sitepoint. Of course, there are many more options when initializing Colorbox on its main page under Settings. Note that we are supporting both Gutenberg and original galleries.
With attachment links, we are going to target links that don’t end in .jpg, .png or .gif. Remember earlier that jQuery :not takes elements that directly follow each other? Well, that is how we will craft our variable for attachment links. Let’s add the code shown in bold below:
        var galleryImgItems = $( '.blocks-gallery-item a[href$=".jpg"], .blocks-gallery-item a[href$=".png"], .blocks-gallery-item a[href$=".gif"], .gallery-icon a[href$=".jpg"], .gallery-icon a[href$=".png"], .gallery-icon a[href$=".gif"]' );
        var galleryAttsItems = $( '.blocks-gallery-item > figure > a:not([href$=".jpg"], [href$=".png"], [href$=".gif"]), .gallery-icon > a:not([href$=".jpg"], [href$=".png"], [href$=".gif"])' );
        …
        } else {
            galleryImgItems.colorbox({
                rel: 'gallery',
                maxWidth: '75%',
                maxHeight: '75%'
            });
        }

        // For galleries that link to attachment pages
        if ( windowWidth < 640 ) {
            galleryAttsItems.colorbox({
                rel: 'gallery',
                iframe: 'true',
                height: '75%',
                width: '100%'
            });
        } else {
            galleryAttsItems.colorbox({
                rel: 'gallery',
                iframe: 'true',
                height: '75%',
                width: '75%'
            });
        }
Alternatively, if you want to have Colorbox activated on all linked images, omit the references to galleries inside of the jQuery objects, ie $( a[href$=".jpg], … );
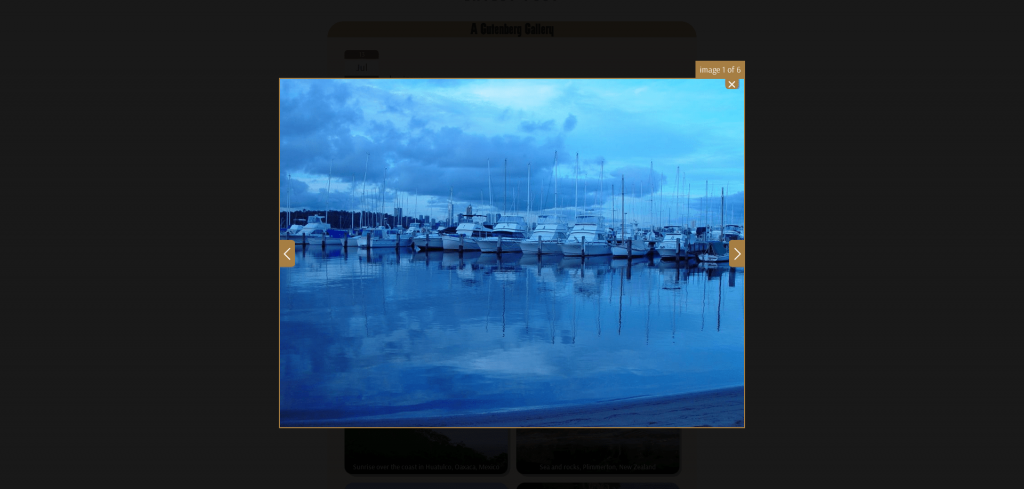
If you test these links out on a gallery in your theme, it should work at this point. You can switch between linking to an attachment or image to see the difference as shown in the screenshots below.
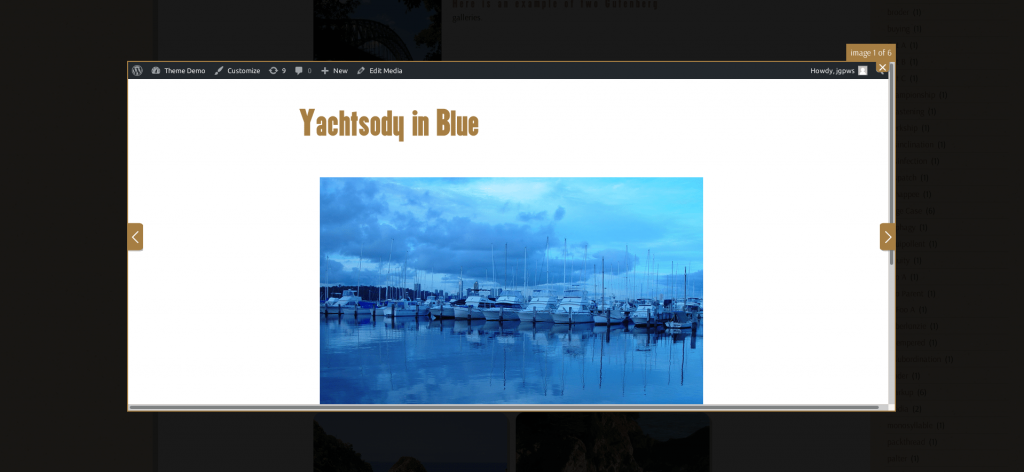
When you do launch the attachment page inside Colorbox, it loads an entire page with header, sidebars and all. We will remove the extraneous items for image attachments in a following tutorial, as adding the information here would make this tutorial very long.
Well, that is our lightbox script so far. For now, see ya later!
Leave a Reply