Converting a Static HTML Site into a WordPress Theme- Part 1
Original published date: 16, May 2010
This tutorial is the third in a series. To see the first sections, use these links below:
Creating a Fancy Website Layout in Gimp 2.6, and How To Slice Up Graphics for XHTML and CSS.
This tutorial is now outdated. To get the latest tutorial, see the page Blue Green Blast is Now Updated for WordPress 3.0.
In this section, we are going to convert our static site into a stand alone WordPress theme. WordPress is blogging and content management software that makes creating and updating a website far easier than maintaining it oneself. You can include or exclude any blog specific elements you wish if you want to use it just for a general website.
Installing WordPress on your Local Computer
In this area, I will be very brief in that I will not tell you how to install WordPress, but point you to resources for downloading everything you need. WordPress runs on a WAMP, LAMP, MAMP setup. The first letter in these acronyms refer to an operating system (Windows, Linux and Mac OSX respectively). A stands for Apache web server, M for MySQL and P for PHP. These all must be installed and working before you can install WordPress. Many WordPress users also use PhpMyAdmin as a GUI for setting up the required MySQL database (once again, I will not go over this, as it is beyond the scope of this article). Luckily, for Windows and Mac users, there are pre-packaged installers that setup and install these for you. Some of these are listed below. For Ubuntu Linux users, I included a very useful article on how to install these individually.
1.
- Windows: WAMP Server XAMPP for Windows
- Macintosh: MAMP XAMPP for Mac OSX
- Linux: HOWTO: Installing and Running WordPress on Ubuntu GNU/Linux ~ Moving to Freedom
If you’re using Linux and you followed the above tutorial, you already installed WordPress and may skip the next step.
2. Now you can download and install WordPress. Information on how to do this can be found at: Installing WordPress from the WordPress codex (see the Resources section below).
In addition, for Windows users, the two tutorials below also describe how to install everything needed here:
Getting Started
*If you are developing this theme on Linux, please see the blog post Ubuntu Linux, Permissions and a Local WordPress Install before getting started.
3. The first step here is to create a folder for our theme in WordPress’s theme directory
- Navigate to our previously created “blue-green-blast” folder; Cut or Copy these files: index.html, style.css, ie_fixes.css and the images folder
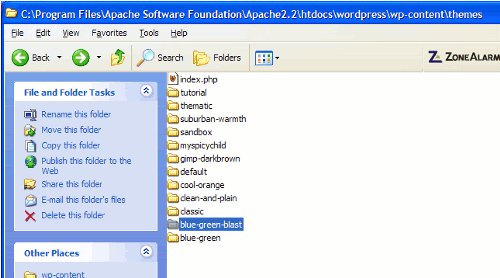
- Now, navigate (in your operating system) to the folder where WordPress is installed. You may have this installed in Apache’s htdocs folder. For instance, this may be located within these folders: Apache Software Foundation > Apache2.2 > htdocs. If you installed WordPress into it’s own folder (usually named blog or wordpress), click that folder as well
- From here, we will navigate to the themes folder. That is found in wp-content > themes
- In this folder is where we will add a new folder or directory for our theme. Create a folder named blue-green-blast and Paste everything into that folder. Now, change the name of index.html to index.php
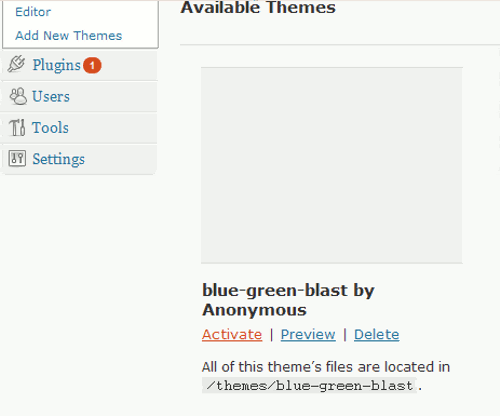
- In the installation step, you probably created a Username and Password to login to WordPress; log in and click Appearance in the Admin panel’s left menu. From here, you should be able to find the folder title blue-green-blast. Click Activate and then right-click Visit Site to see the website in a New Tab
- As you can see, the styling is not applied (our stylesheet link is broken). This will be handled in our next step
Trackbacks and Pingbacks
Trackback URL for this post: https://www.jasong-designs.com/2013/06/16/converting-a-static-html-site-into-a-wordpress-theme-part-1/trackback/


[…] Creating a Fancy Website Layout in Gimp 2.6, How To Slice Up Graphics for XHTML and CSS and Converting a Static HTML Site into a WordPress Theme- Part 1. In the last tutorial, we left off with a website that can be ran from the WordPress content […]