Changing the Look of Urban Square
Upon updating the Urban Square WordPress theme, I thought now would be as good a time as ever to write a tutorial on how to use its customization features to change the look and feel of the theme.
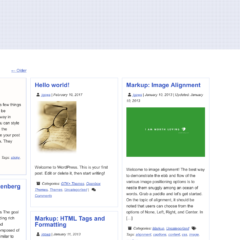
Even though I put a continued effort into updating this theme, the standard design is old fashioned and possibly ugly. We’re going to change it from this (represented by the theme’s screenshot)
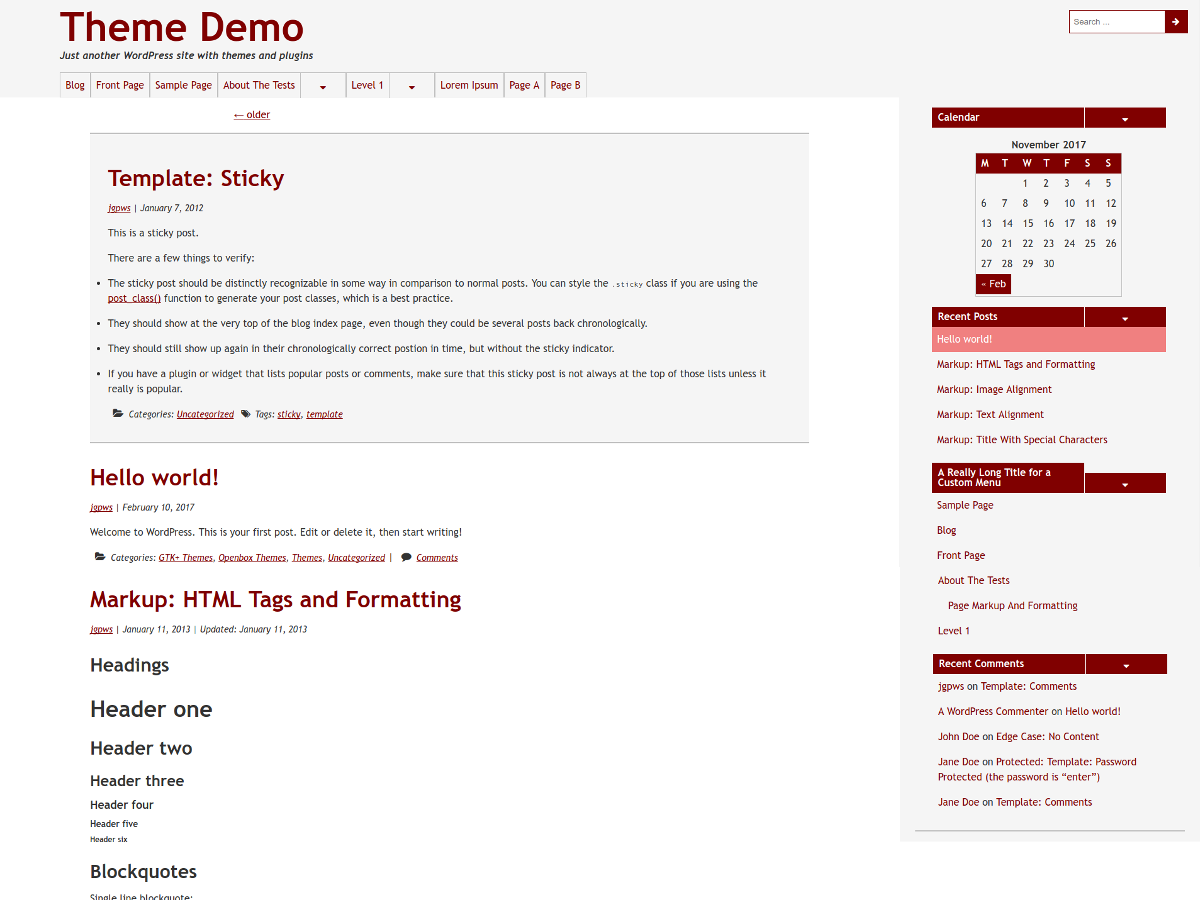
Urban Square before
to this.
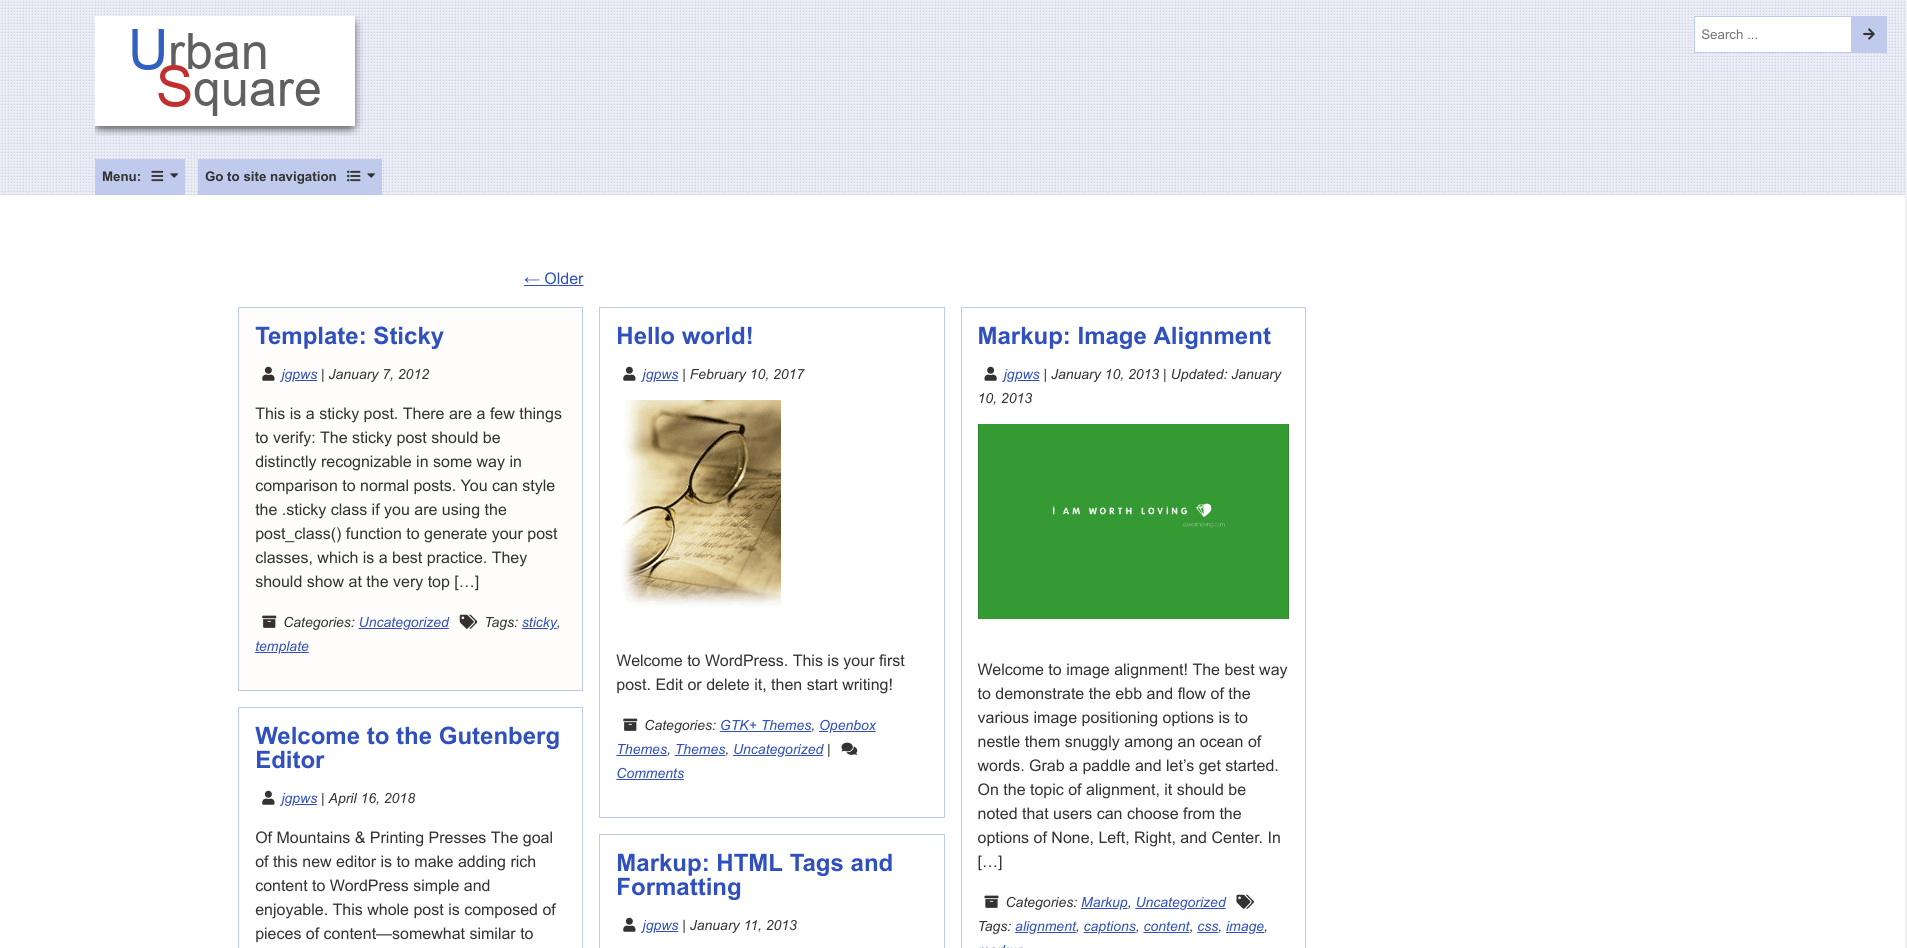
Urban Square after
Our Assets
The first thing to do is supply, you, my readers with the images needed as part of the theme transformation. Here they are below:
![]()
![]()
I gave the pixel bump image extra padding and background color to make it easier to right-click.
To get them into WordPress:
- Right-click each image
- Save the image; usually Save image as…
- The images will likely save to your Downloads folder
- In the WordPress Dashboard, click Media to go to your Media Library
- Click Add New to add the files pixel_bumps.png and urban-square-logo2.png
The Customizer
Most of the settings we will use will be in the Customizer under Appearance → Settings.
Layout
Since this theme is designed for blogs, we will focus on blog layouts. The traditional layout for blog posts is fine, but let’s say we want something more interesting. We will change the layout to Masonry. This style uses CSS to display each post as “bricks” vertically then side by side.
If you look at each brick right now, they look too tall vertically with too much information displayed. Let’s change the content length to display Excerpts, which are short descriptions rather than all of the post. Now our post area looks like the following in the Customizer:

Urban Square Masonry layout
The Masonry and Grid layouts show the menu under a button drop-down and move the sidebar to the bottom of the page for the desktop, just like the standard layout’s tablet size.
Another option here is to remove the Search bar from the header, if you prefer one as a Sidebar widget.
Optional:
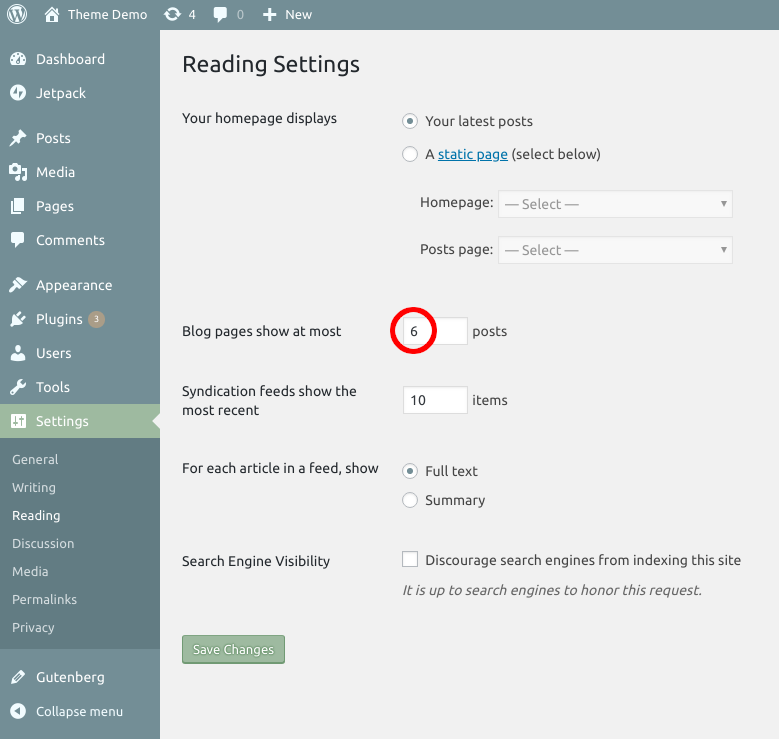
These screenshots were taken in the Chromium web browser, which is similar to Google Chrome. Chromium displays each brick top to bottom, then aligns them side-by-side. This results in extra space where new posts will show up on the right. Setting the max number of blog posts per page to 6 and up seems to work for best spread in desktop widths.
Colors
Now, we will update the color scheme from red to a fresh light blue. But first, I want to mention the tool I keep coming back to to generate a color scheme–The Color Scheme Designer.
- First, let’s enter a base color. In this case it will be the darkest color for our color scheme. Let’s enter the #3050c0 hex code value
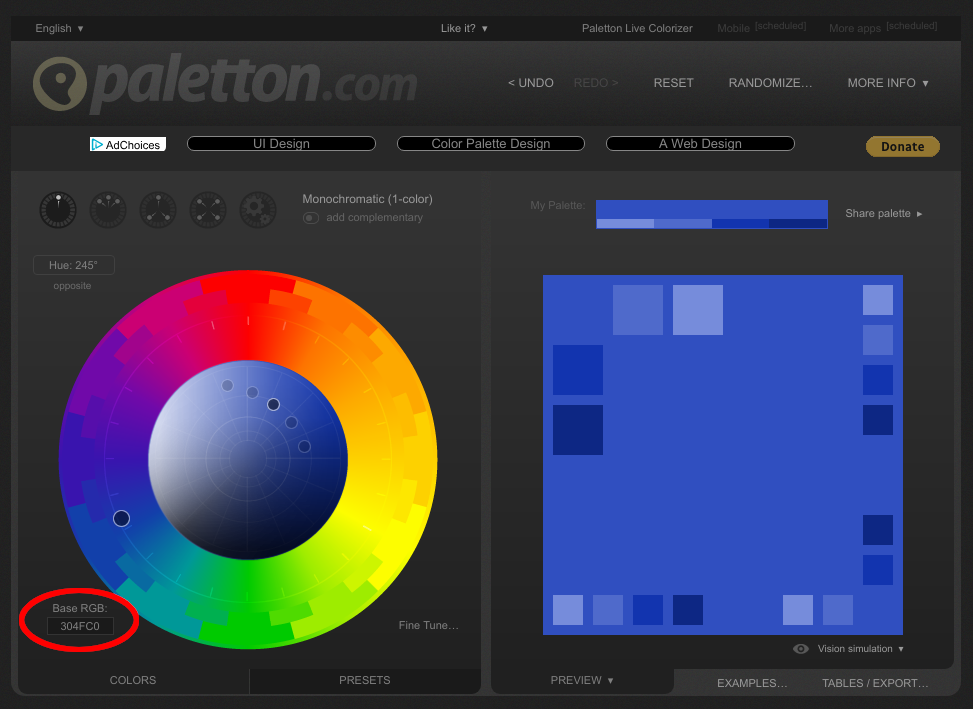
Color Scheme base color
As you can see, the Color Scheme Designer changes the value to #304fc0, which is close enough.
- In the Customizer, change the Header Text Color, Link Color to the recommended new value: #304fc0
- From there, mouse-over the lightest color inside the Preview area as shown below:
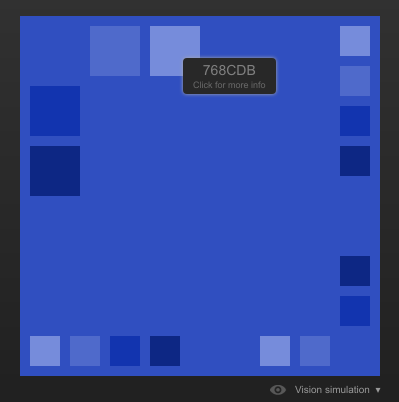
Color Scheme secondary color
The color shown is #768cdb. Enter this color for the Header Text Hover/Active Color and Link Hover/Active Color
- Next, we will change the background for the Header, Footer and Sidebar. For this, we will choose a pale variation of our lightest blue. In Color Scheme Designer, click the color #768cdb, then click Apply as base color
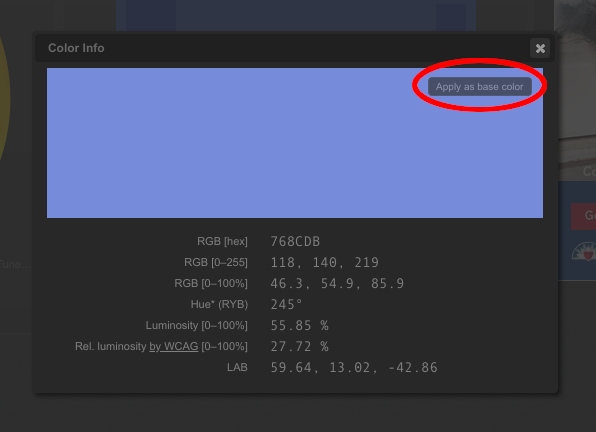
Applying a base color in Color Scheme Designer
- Mouse-over the lightest color in the latest Preview screen. The color will be #d1d9f9
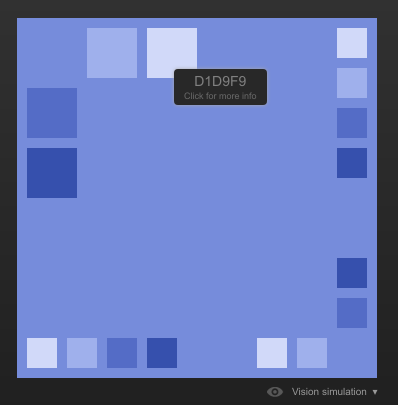
- Click again to make this the base color
- Mouse-over the second lightest color and we will have #f8f9ff. Apply this color to the Header, Footer and Sidebar Background Color and Supporting Hover/Active Color
- We will apply the previous color’s complementary (opposite) color to the Everything Else Background Color. The color is #fffdf7
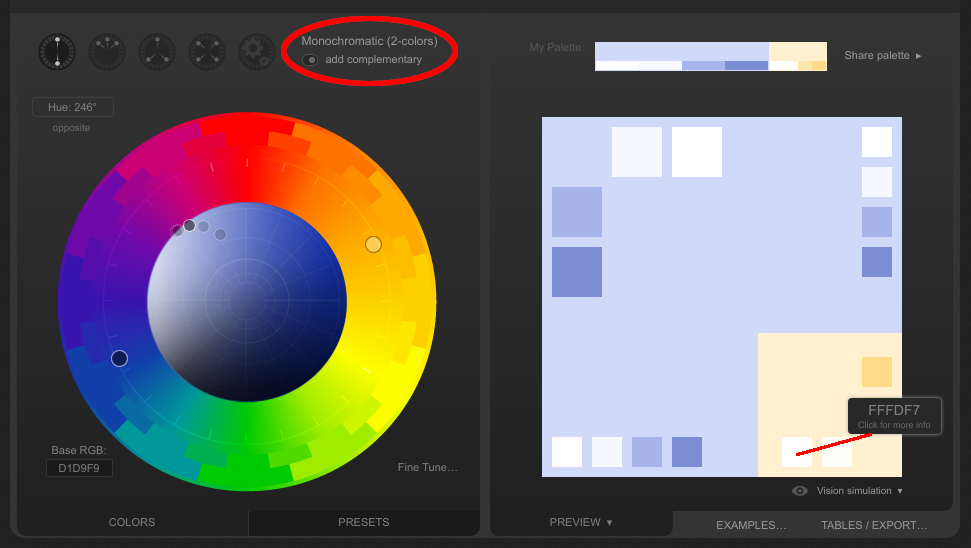
Color Scheme Designer complementary color
- We can leave the Background Color as-is (#ffffff) and change the Menu/Widgets Background Color also to #ffffff
- Finally, for the Supporting Color and Supporting Border Color, we can change them to a subtle blue (#c0caec)
- If you click the Menu drop-down and hover over the menu items, you may notice that the color changes to white, making visibility difficult. We can resolve this by using the Reverse Menu/Widget Link Color to Black option
- Additionally, for the Menu button and Widget titles, Reverse Supporting Color to Black to counter the light backgrounds.
Adding a Logo and Header Image
In the Customizer under Site Identity, you can add or swap out a logo for the Site Title. In our case, we will replace the title with a logo.
- Click Select logo and choose the urban-square-logo2.png (Red and Blue logo); click Select
- Click Skip Cropping
- Uncheck Display Site Title and Tagline
Now we have just the logo.
Next, we will add a header background for an extra touch. Leave the Site Identity section and go to Header Image.
- Click Add new image and select pixel_bumps.png (it will appear blank, as it is a very small image); click Select
- Under the next screen Skip Cropping
- As of right now, you will see very little change. That is because the standard mode for Urban Square header backgrounds is Responsive, designed for a large banner type image. This is a repeating image, so we will choose Repeating mode as shown below:
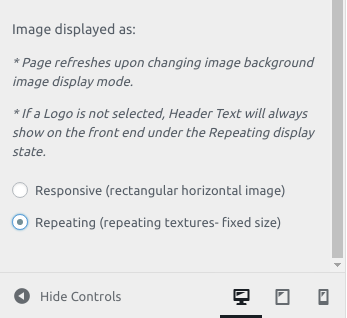
Repeating header background Customizer option
Finally, the finished new look is shown below.
Urban Square after
After adjusting the color schemes, WordPress allows you three options for applying Customizer changes:
- Publish immediately
- Save Draft, where you can show people how your website looks via a Share Preview Link section
- Schedule to apply the new look at a future date
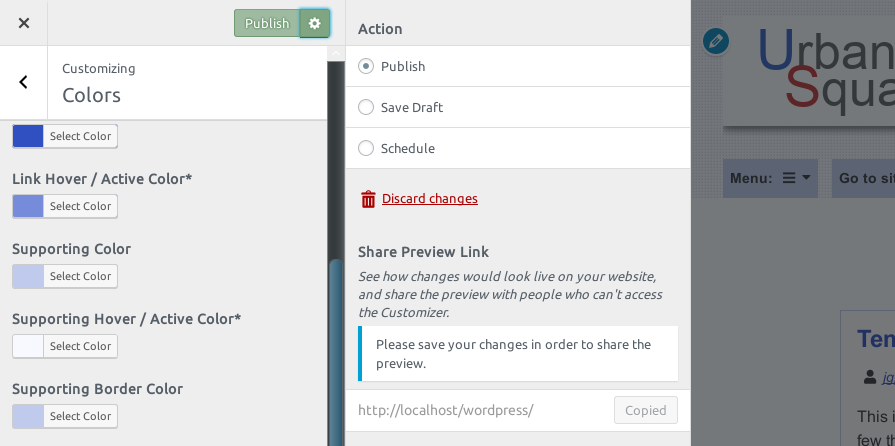
Customizer publishing options
Choose one of these options and save.
In the Customizer Colors section, you can view the current color scheme in the Current Color Scheme control. In order to get the most up-to-date reading, you must refresh the Customizer page. After that, you can simply copy the text and paste the contents into a new file for future reference.
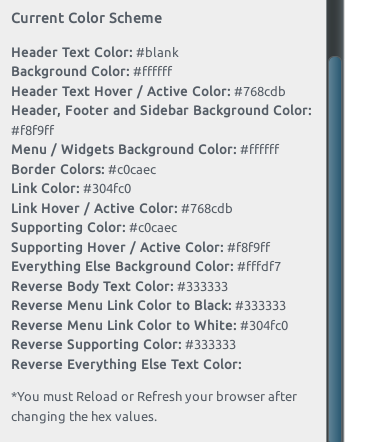
Urban Square Current Colors
Conclusion
Whether you are using this theme or any other, there are always ways that you can customize your blog or website to make it look more unique than your theme’s standard. If you are using a theme from WordPress.org, check out its Customizer settings to see what you can do with it.
Leave a Reply