Converting a Static HTML Site into a WordPress Theme- Part 1
Beginning The Conversion
In this section, a lot of what I learned was the result of following several tutorials that I should list here. They are So you want to create WordPress themes huh? from WpDesigner.com, So You Want To Create WordPress Themes Huh?- The Remix– this deals with creating a Thematic child theme, and Creating a WordPress Theme- Part 1, Fantastic Web Design’s Gimp specific tutorial.
4. Open a text editor and open the file “index.php” from within our theme’s folder
- So far, we have:
-
<!DOCTYPE HTML PUBLIC "-//W3C//DTD HTML 4.0 Transitional//EN">
<html>
<head>
<title>Page title</title>

<link rel=stylesheet type="text/css" href="style.css" media=screen>
<!--[if gte IE 6]>
<link href="ie_fixes.css" rel="stylesheet" type="text/css" media="screen">

<![endif]-->
</head>
<body>

...

</body>
</html>
- Now, we will work on the header area. Notice the changes to our doctype and the html and head tags in bold. Change the code as shown below:
-
<!DOCTYPE html PUBLIC "-//W3C//DTD XHTML 1.0 Transitional//EN" "http://www.w3.org/TR/xhtml1/DTD/xhtml1-transitional.dtd">
<html xmlns="http://www.w3.org/1999/xhtml" xml:lang="en" lang="en">
<head profile="http://gmpg.org/xfn/11">
<title><?php bloginfo('name'); ?><?php wp_title(); ?></title>
<meta http-equiv="Content-Type" content="<?php bloginfo('html_type'); ?>;charset=<?php bloginfo('charset'); ?>" />
<meta name="generator" content="WordPress <?php bloginfo('version'); ?>" />
<!-- our main stylesheet -->
<link rel="stylesheet" type="text/css" href="<?php bloginfo('stylesheet_url'); ?>" media="screen" />
<link rel="alternate" type="application/rss+xml" title="RSS 2.0" href="<?php bloginfo('rss2_url'); ?>" />
<link rel="alternate" type="text/xml" title="RSS .92" href="<?php bloginfo('rss_url'); ?>" />
<link rel="alternate" type="application/atom+xml" title="Atom 0.3" href="<?php bloginfo('atom_url'); ?>" />
<link rel="pingback" href="<?php bloginfo('pingback_url'); ?>" />
<?php wp_get_archives('type=monthly&format=link'); ?>
<?php //comments_popup_script(); // off by default ?>
<?php wp_head(); ?>
</head>
*Note: I fixed the code above, as the original code shown did not pass XHTML validation.
- After checking the look of the theme in both Firefox and Internet Explorer 7 with and without the ie_fixes stylesheet, it looks like WordPress’s rendering environment already handles IE7’s layout issues, so I left out the fixes stylesheet (for now)
- The next step in this process is to change the blog title to reflect our WordPress site. Change
<h1>My Blog</h1>to<h1><a href="<?php bloginfo('url'); ?>"><?php bloginfo('name'); ?></a></h1>. And, we change the blog subtitle as well adding this between our paragraph tags:<p><?php bloginfo('description'); ?></p>. What this process does is add a link to our WordPress site’s home page onto our blog’s title - Finally, we get to the possibly most important steps in our conversion process: the WordPress Loop. The WordPress Loop is basically what puts each and every post on the page. It will be used in the index page, single post page and several other pages in our theme. More information can be found at wordpress.org- The Loop. Now we will replace our Lorem Ipsum text on our front page. Type the following below the <div id=”content”> tag in our index.php page’s code:
-
<?php if(have_posts()) : ?><?php while(have_posts()) : the_post(); ?>
- The following goes after the </p> tag just before our div that closes the content section:
-
<?php endwhile; else: ?> <p><?php _e('Sorry, no posts matched your criteria.'); ?></p> <?php endif; ?> - For this part, we will refer to the page in WordPress’s codex, Template Tags (see Resources at the bottom of this tutorial). We are going to replace the generic “Post 1” title with our actual blog post titles, and of course a link to the associated post. Just after the <h2> tag, type
<?php the_title(); ?>.
Now, we will place links to the post around our titles and add a class (for specialized CSS) by modifying our code: <h2 class="entry-title"><a href="<?php the_permalink() ?>"><?php the_title(); ?></a></h2>.
Next, we will replace our dummy Lorem Ipsum text with the real content. Replace the Lorem Ipsum text and <p> tags with <div class="entry"><?php the_content(); ?></div>
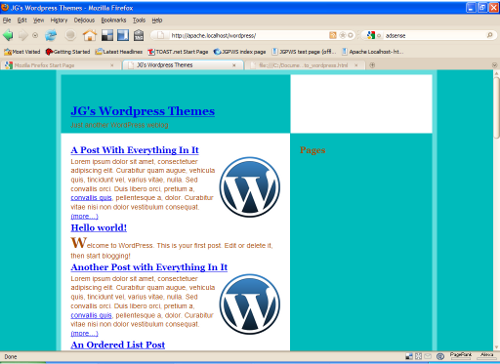
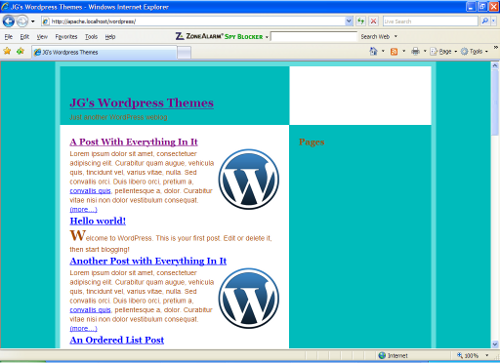
You may already have a WordPress blog with several posts, which will show up in this tutorial. But, if you don’t, you may want to create dummy pages to test your theme. Enter WPCandy’s Sample WordPress Content. This handy xml file provides just that. Instructions on how to install can be found at their website. This is what I used for development. The look of the blog’s index page thus far in Firefox and Internet Explorer 7 is shown in the screenshots below:
Trackbacks and Pingbacks
Trackback URL for this post: https://www.jasong-designs.com/2013/06/16/converting-a-static-html-site-into-a-wordpress-theme-part-1/trackback/


[…] Creating a Fancy Website Layout in Gimp 2.6, How To Slice Up Graphics for XHTML and CSS and Converting a Static HTML Site into a WordPress Theme- Part 1. In the last tutorial, we left off with a website that can be ran from the WordPress content […]