Converting a Static HTML Site into a WordPress Theme- Part 2
Styling the Calendar
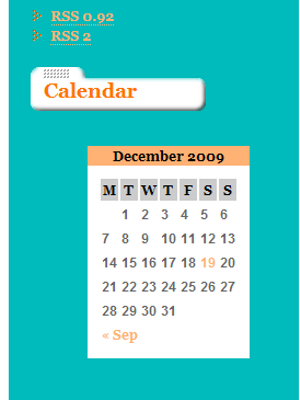
10a. Even though the Calendar doesn’t show up as a default in our theme, we want it to look good should someone use it as a widget. So, we will style the calendar. Afterwards, I will provide a screenshot of how it looks. Open style.css, and type this at the bottom:
/* Calendar */
#calendar_wrap {
width: 251px;
padding-top: 20px;
}

#wp-calendar {
margin: 0 auto; /* works in standards browsers */
background-color: #FFFFFF;
padding: 10px;
}

#wp-calendar a:hover {
color: #FF7400;
text-decoration: underline;
}

#wp-calendar caption {
background-color: #FFB273;
color: #000000;
}

#wp-calendar thead {
background-color: #CCCCCC;
color: #000000;
}

#wp-calendar tbody {
font-family: Arial, Helvetica, "Nimbus Sans L", sans-serif;
color: #666666;
}
*The default WordPress Calendar has a rendering issue, where if a month starts on a Monday, the top row of days gets pushed to the right. There is currently no fix for this, but it is being addressed for a future installation. More information can be found at core.trac.wordpress.org/ticket/11414.
Optional: Making our Theme Adsense Friendly
I made this section optional because making your theme Adsense friendly is not a must have for every theme, but if your theme’s users can make a little cash on the side, why not? We will not be placing actual Adsense code, but placeholders that can be replaced with code. This section will also introduce WordPress shortcodes. I learned this information from two web pages, Theme Forest’s 9 Useful Snippets for Your WordPress Functions and Smashing Magazine’s Mastering WordPress Shortcodes. *This section assumes knowledge of how to generate an Adsense script.
11a. First thing, you may want to use the four images below as Adsense placeholders. You may store them anywhere you’d like, but a good idea would be to store them in this theme’s images folder (blue-green-blast/images).


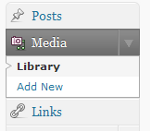
 11b. This section is optional as well, but if you want to use these placeholders in any theme you want, they can be uploaded to WordPress’s Media Library. Select Media from within the WordPress Admin panel. Select Add New. Next, Select Files, navigate to where you stored the images and click Open (the final dialog box is dependent on your operating system; in Windows XP the button reads Open).
*If you want to leave the images where they are (in the Blue Green Blast images folder), just replace the references to the Media Library with <img src="' . get_bloginfo('template_directory') . '/images/name-of-image" alt="Alt text that describes the image" />, where name-of-image is the file name.
11c. We will set the Media Library aside for now and turn to our Functions file. Open functions.php in a text editor. Just below the section where we widgetized the sidebar, we will add a new function. Some place everything in one <?php ?> tag, but for clarity, I will place these in separate tags. The next bit of code defines a function that places a div tag on the page with the Adsense placeholder; then it adds a shortcode that can be placed within Posts or Pages. To place Adsense code in a widgetized sidebar, it can be pasted directly into a Text widget. The pseudo-code for the first example is below:
<?php
//adsense placeholder functions and shortcodes
function show250left() {
return '<div id="ad250-floatleft"><img src="http://[localhost]/directory-where-worpdress-is-installed/wp-content/uploads/[year]/[month]/ad_placeholder250.png"></div>';
}
add_shortcode('ad250-floatleft', 'show250left');
?>
11d. Within the code, you may notice the code that begins with http://[localhost]…. Plugging this in will probably generate an error. This is where the Media Library comes back into play. In the Media Library, look for ad_placeholder250. When you mouseover the image, an Edit option appears, select it. At the bottom, there is a File URL. Highlight this and Ctrl-C/Cmmd-C to Copy the URL.
 11e. Back in our Functions file, Paste the code in place of the the pseudo-code. The snippet below shows what my code looks like. Note that your code will look significantly different:
<?php
//adsense placeholder functions and shortcodes
function show250left() {
return '<div class="ad250-floatleft"><img src="http://apache.localhost/wordpress/wp-content/uploads/2010/01/ad_placeholder250.png"></div>';
}
add_shortcode('ad250-floatleft', 'show250left');
?>
11f. Next, we will add a little styling for how we place this in the blog. If you noticed, we added a class ad250-floatleft. In style.css, type:
/* Adsense classes */
.ad250-floatleft {
float: left;
padding: 0 1em 1em 0;
}
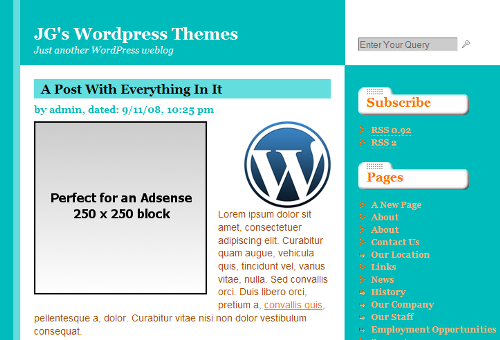
11g. In order to use these placeholders, simply place a shortcode within a Post or Page by inserting [ad250-floatleft] (for our first example). The screenshot below shows how this looks within a post in our theme.
To use the actual Adsense code, just replace the entire image tag in the function.
<?php
//adsense placeholder functions and shortcodes
function show250left() {
return '<div class="ad250-floatleft"> Adsense code goes here... </div>';
}
add_shortcode('ad250-floatleft', 'show250left');
?>
11i. Okay, so now I’m going to let you, my readers, figure out how to put together the rest of the the functions. A clue is to name the function for a right aligned 250 by 250 Adsense placeholder show250right() and name the corresponding class ad250-floatright.
Screenshot and Resources
Our product and thus our tutorial series is finished. But one final step is that we need a 300 by 225 pixel screenshot for the preview in the Admin panel. It is provided below. This has to be placed in the blue-green-blast folder. Enjoy!
Blue Green Blast is now available for download at Jason G. Designs, my blog. A link to download the theme as well as a preview is at http://www.jasong-designs.com/2011/04/25/blue-green-blast/. Some changes made to the theme include a logos panel at the bottom of the page, a functions.php file that now points to the Adsense placeholders in the local images folder (eliminating the need to upload the files to WordPress’s Media folder), and in the downloadable version, the footer title “Blue Green Blast” links to it’s web post on my blog.
Trackbacks and Pingbacks
Trackback URL for this post: https://www.jasong-designs.com/2013/06/30/converting-a-static-html-site-into-a-wordpress-theme-part-2/trackback/


[…] Converting a Static HTML Site into a WordPress Theme- Part 2 […]
the list of wordpress themes
Converting a Static HTML Site into a WordPress Theme- Part 2 | Jason G. Designs