How to Install Adobe ICC Profiles in Ubuntu with a GUI
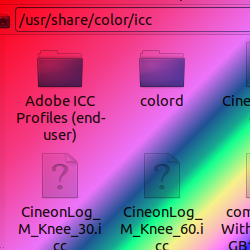
Just yesterday, I installed Adobe’s ICC Profiles on my Ubuntu computer. If you look in the folder usr/share/color/icc, you will see the preinstalled color profiles that come with Ubuntu. These profiles control how color is displayed on your monitor, from the printer, etc. So, why would anyone need to install Adobe’s color profiles on their machine? One of the reasons is that it includes several CMYK profiles for print.
If you are using the Separate or Separate+ plugin with GIMP, these profiles are needed for the plugin’s conversion process. In this short tutorial, I will explain how to install the Adobe ICC profiles, along with how to deal with the permissions issues that will arise.
Downloading the files
- Since I couldn’t find files specifically downloadable for Linux, I just grabbed the Windows zip files. See this web address (http://www.adobe.com/support/downloads/iccprofiles/iccprofiles_win.html) to download the zip file. Click the link for ICC profile download for End Users. From there you will be taken to their End user license page; click Accept at the bottom of the page
- The next page lists all of the profiles included with this package. You can review the profiles then click Proceed to Download. From here the file will be in your Downloads directory
Running the File Manager as root
- First, open the Downloads directory (home/username/Downloads). Right click the folder AdobeICCProfilesCS4Win_end-user.zip and select Extract Here. The resulting folder will be titled Adobe ICC Profiles (end-user)
- The directory we need to install to (usr/share/color/icc) needs root permissions to move the files. For this we can use Ubuntu’s Run command. I’m using Lubuntu, so I am not sure how to do this via the GUI in Ubuntu’s default desktop. I clicked an icon in the lower left of the bottom menubar and then clicked Run. You may also use the Terminal for this purpose. Type gksudo nautilus and push Enter. From here, you will be asked for the root password. Type it in and push Enter. A new window with root privileges will open up
- From here there should be access to the File System. In the Downloads folder, click the Adobe ICC Profiles (end-user) folder and hit Ctrl-C to copy (or right-click, Copy). Navigate to the folder usr/share/color/icc, then click into the icc folder and hit Ctrl-V (or right click, Paste in an empty area of the folder).
That’s it! You have now installed Adobe’s ICC Profiles, including CMYK support on your Linux box. If you plan to work with files destined for print from Gimp or Inkscape, these ICC profiles will come in handy. There are probably tutorials on how to activate CMYK support from within Gimp or Inkscape, but that information is outside of the scope of this tutorial–Nothing a little Googling won’t fix:). Thanks for reading.

which cmyk icc profile is good for printing, which one is most used.
is a svg or tiff saved with icc profile by inkscape or gimp printable by adobe Photoshop,illustrator or InDesign.
This all depends on which device you’ll be using for printing. All printers handles colors differently and such you’ll be best of using an icc profile which is generated for your particular printer (or type of printer).